End-to-End Model Training Pipeline
Mục tiêu Task 4
Huấn luyện mô hình dự báo BASKET_PRICE_SENSITIVITY (Low/Medium/High) bằng Amazon SageMaker với pipeline tự động ETL → Training → Model Registry.
→ Trái tim của MLOps pipeline - từ dữ liệu thô đến model production-ready.
Input
- AWS Account với quyền SageMaker/S3/CloudWatch
- S3 bucket với dữ liệu (từ Task 3)
- IAM Role SageMaker (từ Task 2)
Kết quả
- Model đạt accuracy ≥ 80%, F1 ≥ 0.7
- Model được đăng ký trong Model Registry
- Artifacts lưu trữ trong S3
Chi phí: ~$0.3-0.5/job (ml.m5.large, 10-15 phút)
💡 Task 4 - MLOps Core Pipeline:
- ETL tự động - Raw data → Features
- Model training - Random Forest classifier
- Model evaluation - Accuracy, F1, Confusion Matrix
- Model Registry - Version control và approval
1. Chuẩn bị môi trường và kiểm tra prerequisites
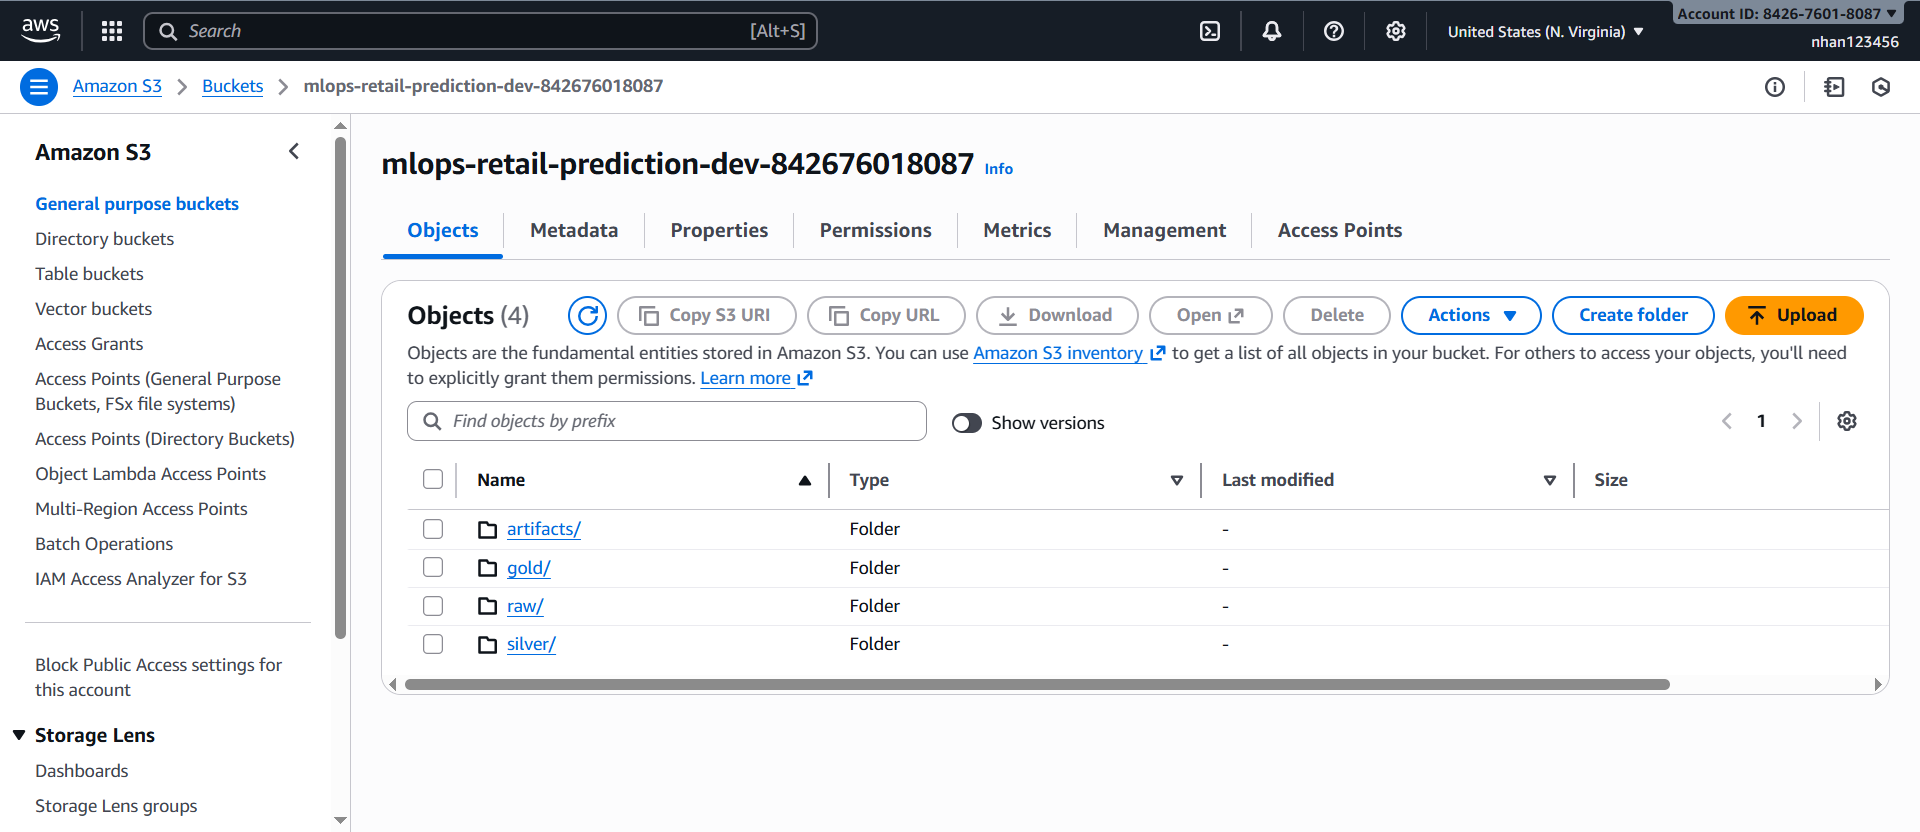
1.1. Kiểm tra S3 bucket (từ Task 3)
AWS Console → S3:
-
Tìm bucket:
mlops-retail-prediction-dev-[account-id] -
Kiểm tra cấu trúc thực tế:
raw/           # transactions.csv + _select/ folder
silver/        # shop_week partitions (200607-200619)
gold/          # features đã xử lý (sẽ tạo từ silver/)
artifacts/     # model outputs (sẽ tạo)
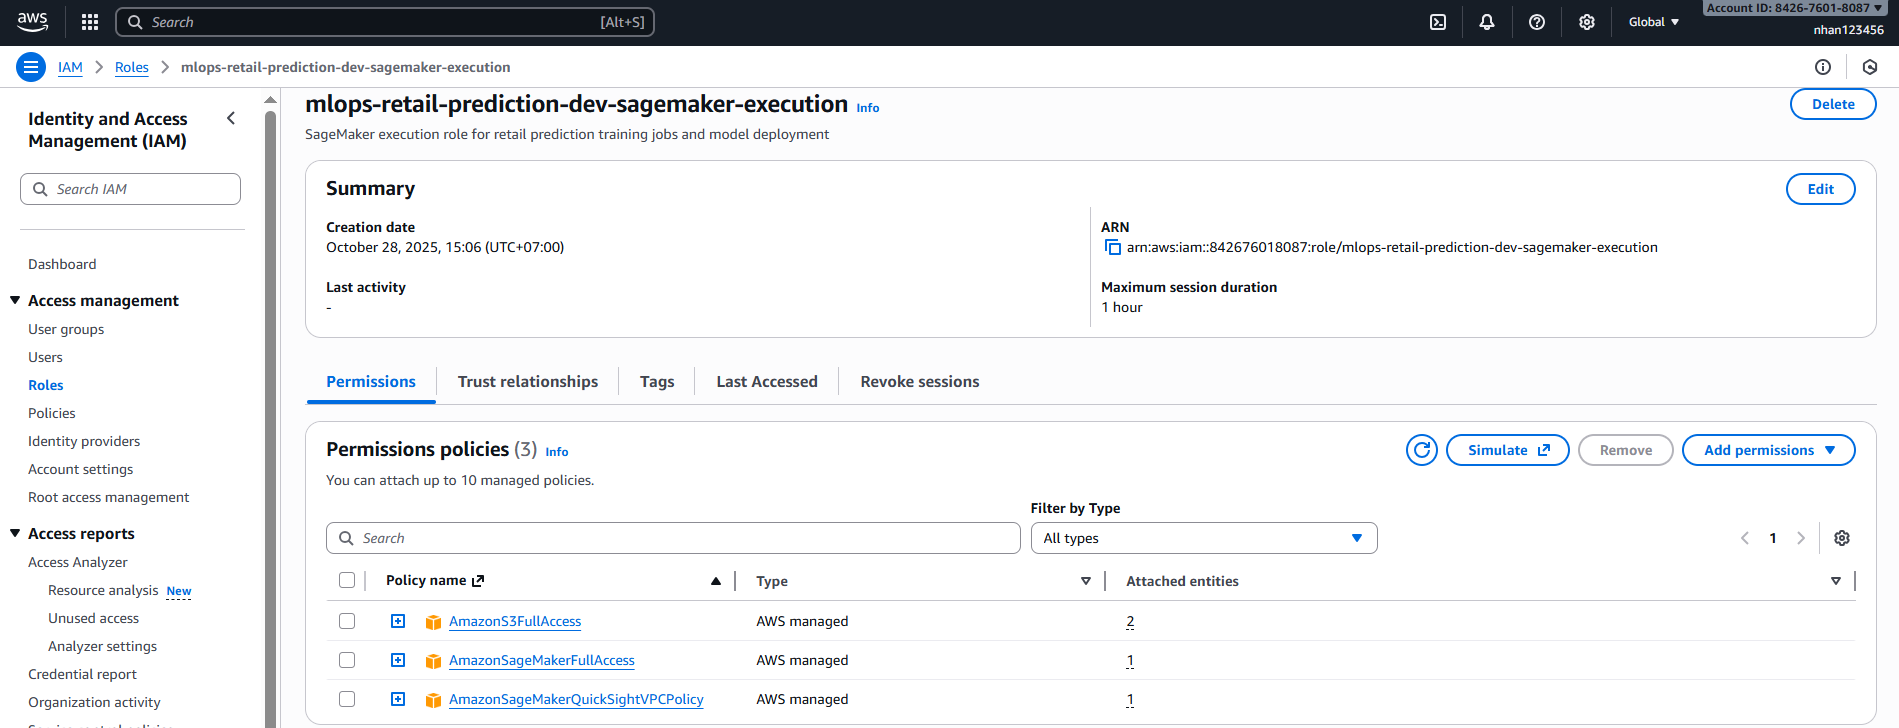
1.2. Xác minh IAM Role (từ Task 2)
AWS Console → IAM → Roles:
- Tìm role:
mlops-retail-prediction-dev-sagemaker-execution - Kiểm tra permissions:
- ✅
AmazonSageMakerFullAccess - ✅
AmazonS3FullAccess - ✅
CloudWatchLogsFullAccess
- ✅
Warning: Nếu bucket của bạn dùng SSE-KMS, role cần có quyền decrypt/encrypt với KMS key; nếu dùng cross-account S3, kiểm tra thêm trust policy.
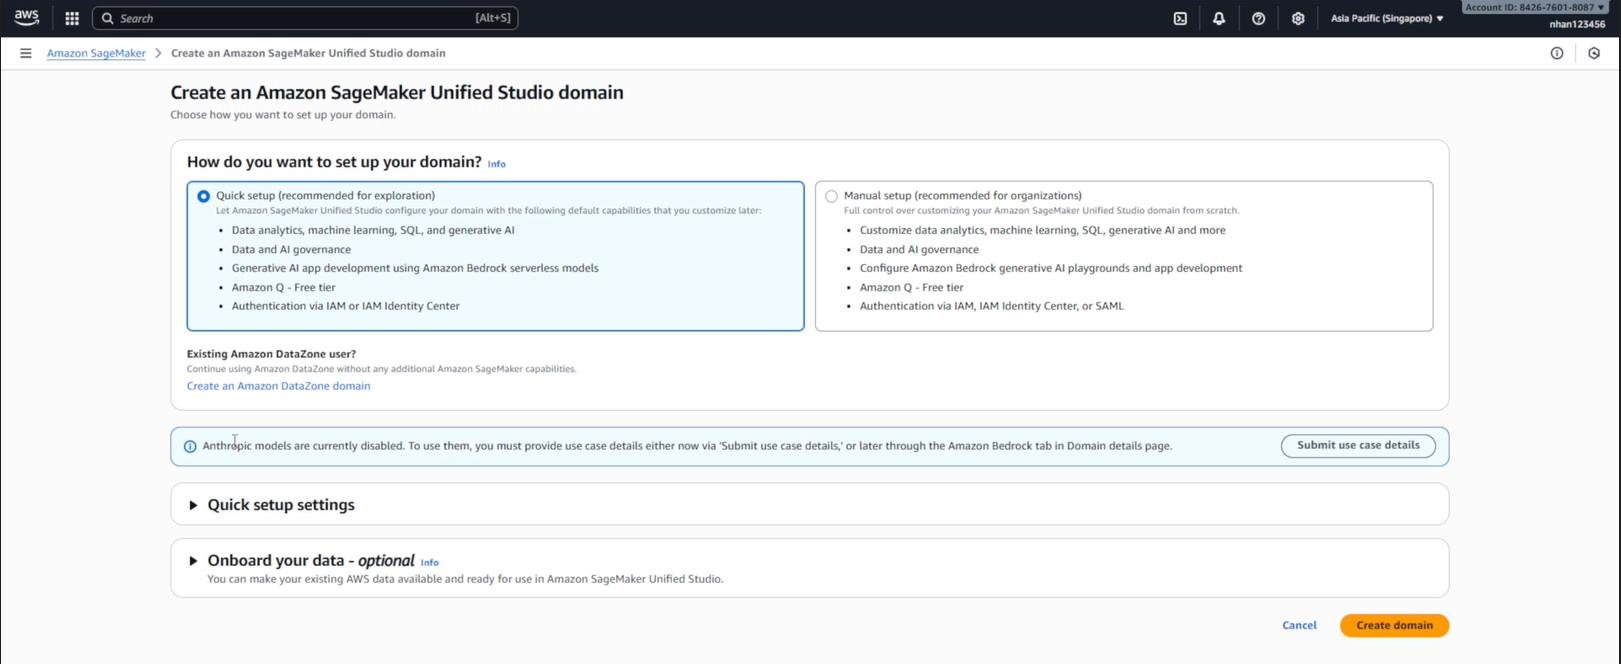
2. Tạo SageMaker Domain và Project
2.1. Truy cập SageMaker Unified Studio
AWS Console → SageMaker:
- Truy cập URL:
https://[domain-id].studio.sagemaker.[region].amazonaws.com - Hoặc từ SageMaker Console → Studio → Open Studio
- Chọn authentication method:
- Sign in with SSO (nếu có setup SSO)
- Sign in with AWS IAM (dùng IAM user/role)
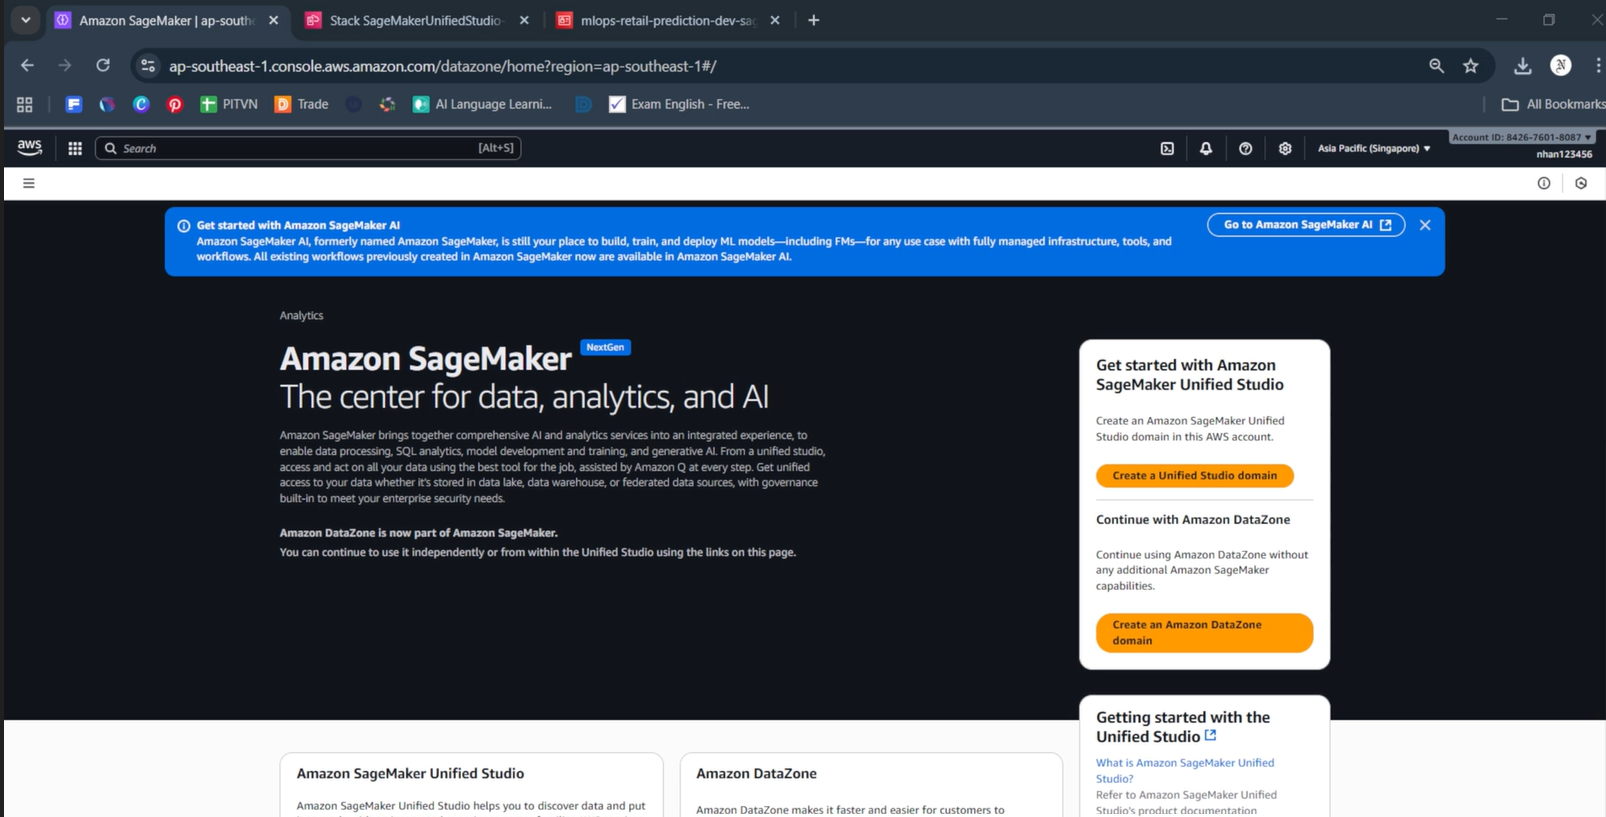
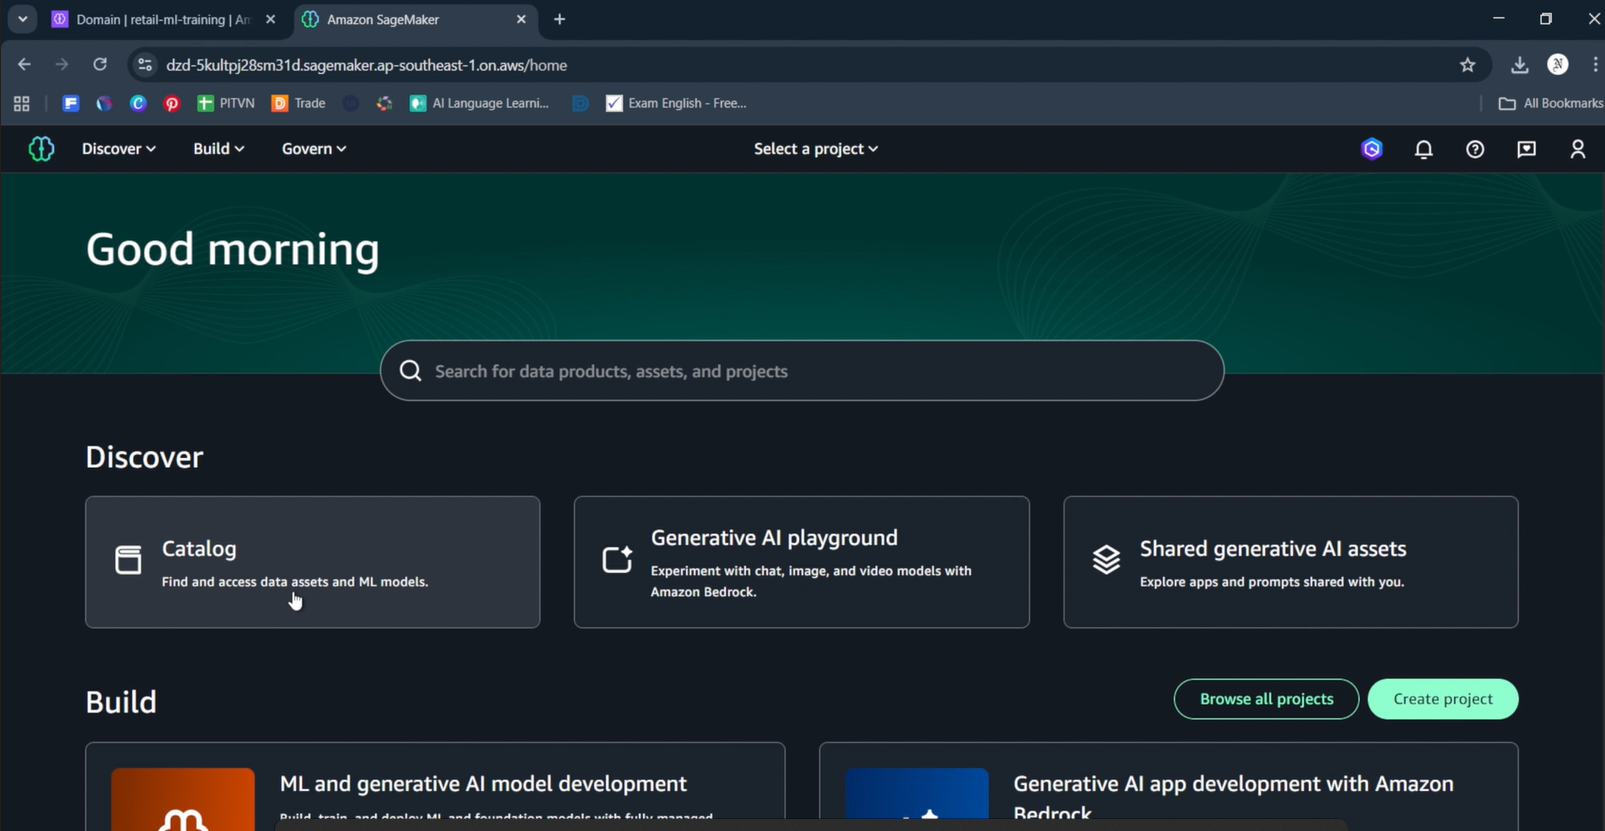
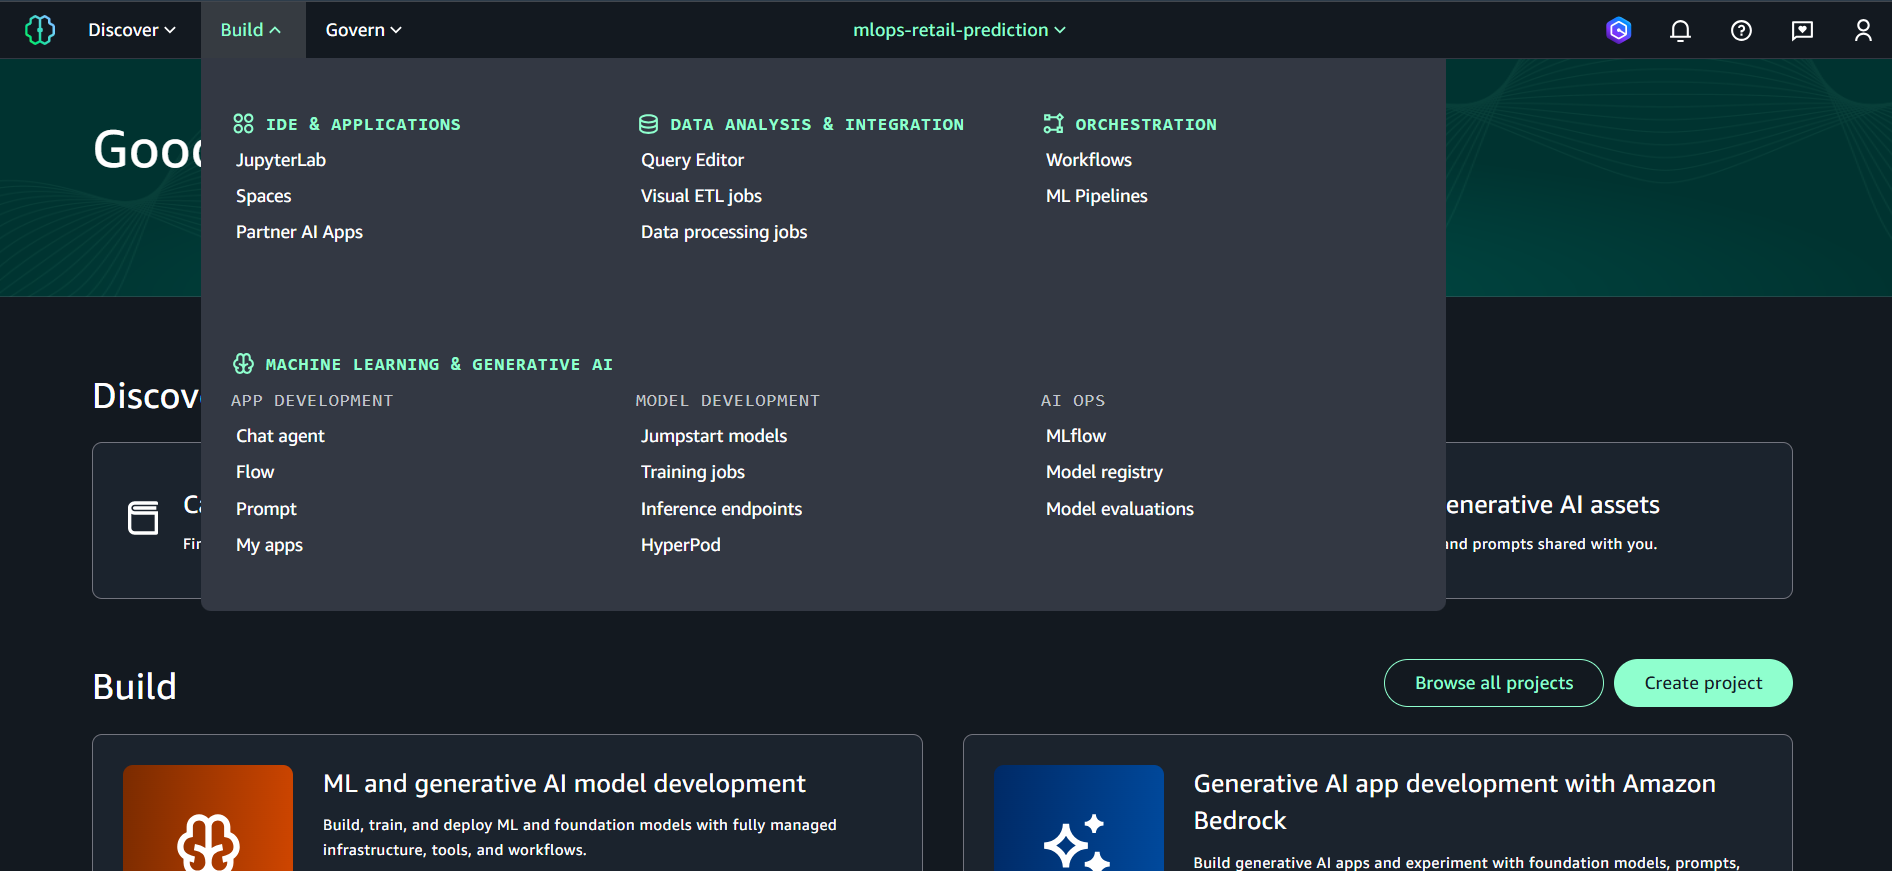
- Sau khi đăng nhập, bạn sẽ thấy giao diện SageMaker Unified Studio
- Dashboard hiển thị:
- “Good morning” greeting
- Search bar: “Search for data products, assets, and projects”
- Discover section: Catalog, Generative AI playground, Shared generative AI assets
- Build section: ML and generative AI model development, Generative AI app development
- Browse all projects và Create project buttons
💡 SageMaker Unified Studio:
- Unified interface cho data analytics, ML, và generative AI
- Project-based workspace với shared resources
- Built-in collaboration với team members và approval workflows
- Integrated tools: Notebooks, Visual ETL, Workflows, Chat agents
2.2. Tạo Project trong Unified Studio
Trong SageMaker Unified Studio dashboard:
Bước 1: Truy cập Create Project
- Trong Build section, click “Create project” (nút xanh)
- Hoặc click “Browse all projects” → “Create project”
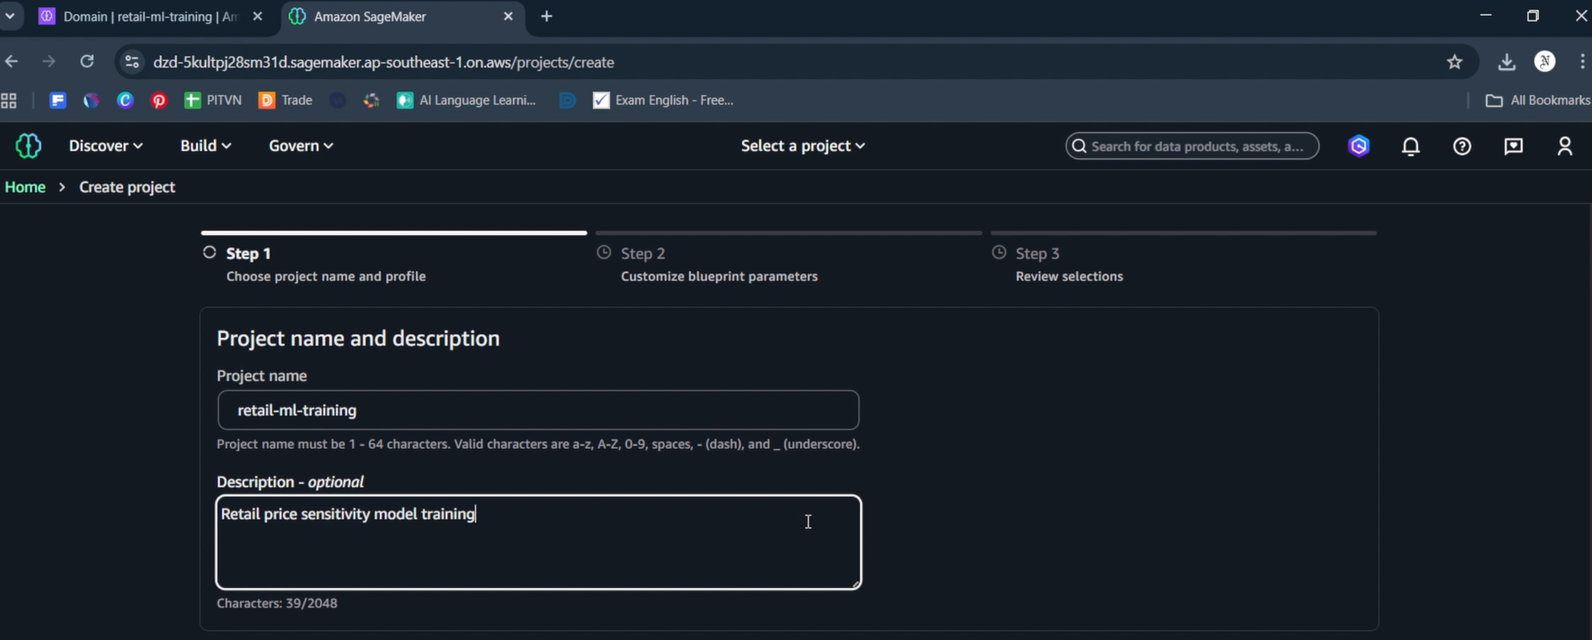
Bước 2: Điền thông tin Project (Step 1)
- Project name:
retail-ml-training - Description:
Retail price sensitivity model training - Click Next để chuyển tới Step 2
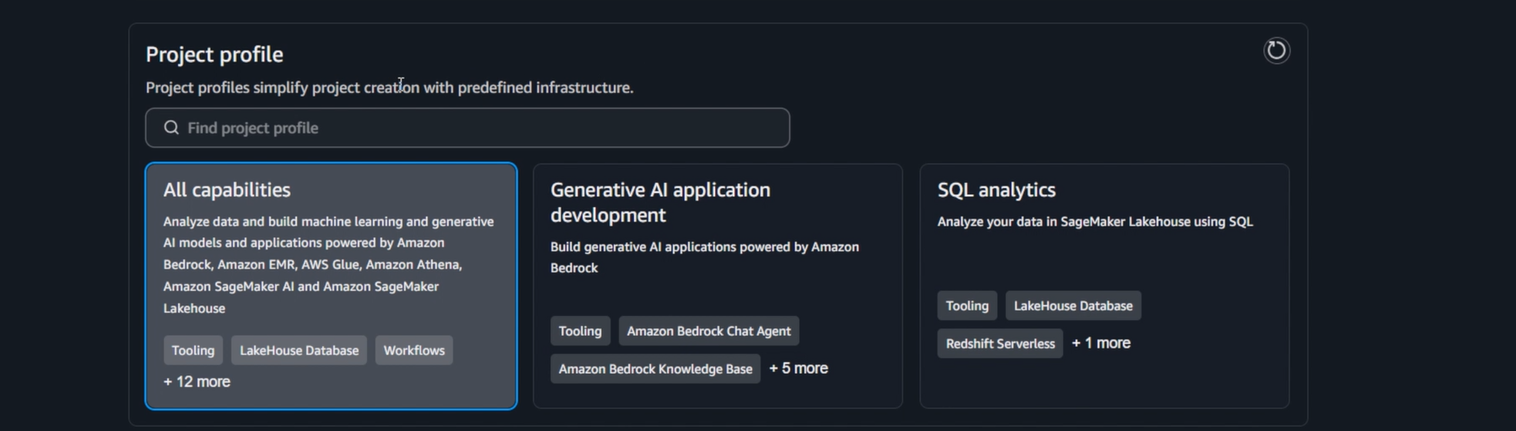
Bước 2.5: Chọn Project Profile (Step 2)
- Project profile: Chọn “All capabilities” (highlighted in blue)
- Description: “Analyze data and build machine learning and generative AI models and applications powered by Amazon Bedrock, Amazon EMR, AWS Glue, Amazon Athena, Amazon SageMaker AI and Amazon SageMaker Lakehouse”
- Tooling: LakeHouse Database, Workflows
- + 12 more capabilities
- Các options khác: Generative AI application development, SQL analytics
Bước 3: Blueprint Parameters
- S3 location:
s3://amazon-sagemaker-[account-id]-ap-southeast-1-[random-id] - Retention: 731 days
- Enable Project Repository Auto Sync: false
- Lakehouse Database:
glue_db
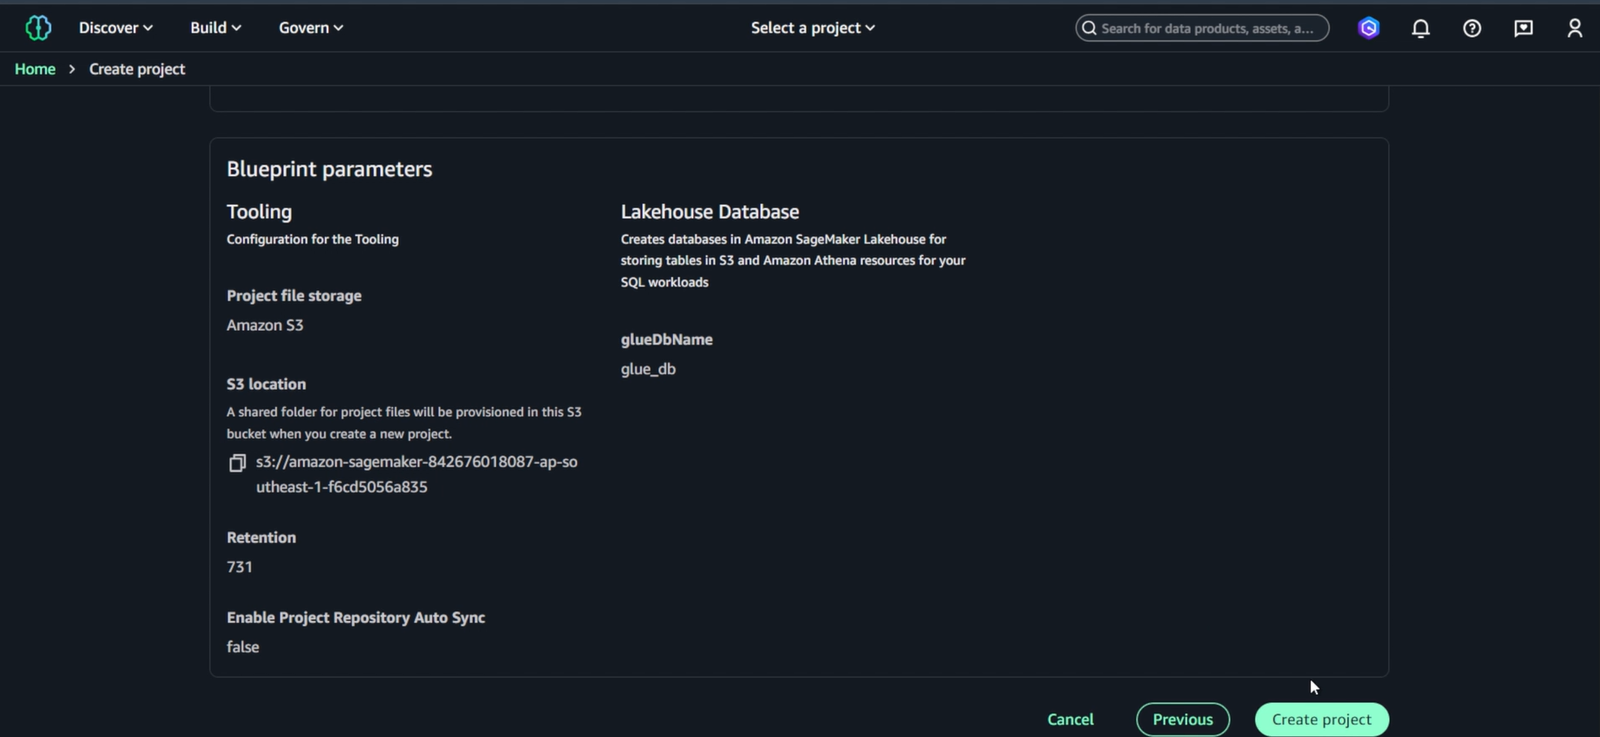
Bước 4: Create Project
- Review các settings và click “Create project”
- Đợi 2-3 phút để Project được provisioned
2.3. Truy cập Project Workspace
Sau khi Project retail-ml-training tạo thành công:
Bước 1: Vào Project Overview
- Project sẽ hiển thị trong danh sách với status “Created”
- Click vào project name
retail-ml-trainingđể vào Project overview - Project overview hiển thị:
- Project title:
retail-ml-training - Description: “Retail price sensitivity model training”
- Project files (6):
.ipynb_checkpoints,workflows,.libs.json,.temp_sagemaker_unified_studio_debugging_info,README.md,getting_started.ipynb - S3 path:
/dzd-5kultpj28sm31d/cu2gr2js1w1wv(project workspace path) - Actions và New dropdown buttons
- Project overview (active)
- Data - data assets và connections
- Compute - compute resources và environments
- Members - team collaboration
- Project catalog (expandable)
- Assets, Subscription requests, Data sources, Metadata entities
- Project title:
Bước 2: Tạo Notebook
- Click “New” dropdown (nút xanh) → chọn “Notebook”
- New dropdown hiển thị các options (theo thứ tự trong hình):
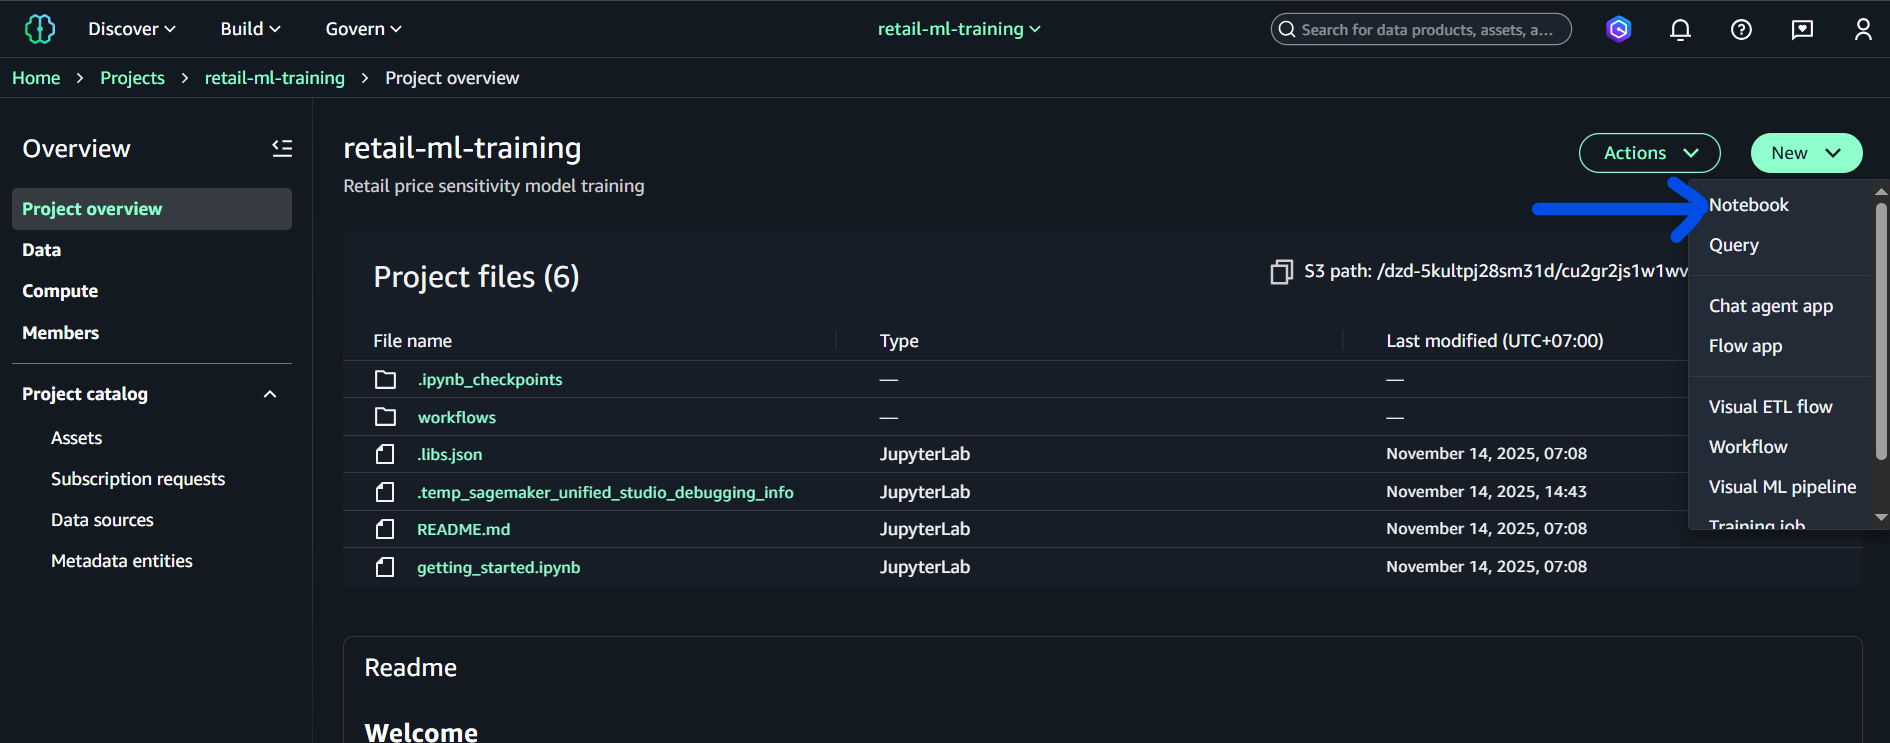
- Notebook (chọn option này)
Bước 3: Project Welcome Trong project overview, bạn cũng thấy Readme section hiển thị “Welcome” với hướng dẫn bắt đầu sử dụng project.
2.4. Xác minh EC2 Permissions (đã có từ Task 2)
EC2 permissions đã được cấu hình đầy đủ trong Task 2, bao gồm inline policy SageMakerEC2Access trong role mlops-retail-prediction-dev-sagemaker-execution.
Xác minh EC2 permissions đã có:
# Kiểm tra inline policy đã được thêm từ Task 2
aws iam get-role-policy --role-name mlops-retail-prediction-dev-sagemaker-execution --policy-name SageMakerEC2Access

# Test quyền EC2 describe
aws ec2 describe-vpcs --region us-east-1
Role đã có đủ 4 policies từ Task 2:
- ✅
AmazonSageMakerFullAccess(AWS managed) - ✅
AmazonS3FullAccess(AWS managed) - ✅
CloudWatchLogsFullAccess(AWS managed) - ✅
SageMakerEC2Access(inline policy cho Project creation)
Project creation ready: Role đã được cấu hình đầy đủ từ Task 2, có thể tạo Project ngay lập tức.
2.5. Khuyến nghị Region cho Task 4
Tóm tắt: Nếu dữ liệu gold/ và artifacts/ hiện đang nằm trong bucket mlops-retail-prediction-dev-842676018087 (region us-east-1), khuyến nghị là tạo SageMaker Domain / Project ở cùng us-east-1 để tránh lỗi cross-region (S3 301), phức tạp với KMS và endpoint.
-
Lợi ích khi tạo Project ở
us-east-1:- Loại bỏ lỗi ‘bucket must be addressed using the specified endpoint’ khi SageMaker tải dữ liệu từ S3.
- Không cần duy trì KMS keys hoặc IAM policies ở nhiều region.
- Ít rủi ro khi chạy training jobs từ Studio/Project.
-
Khi cần tạo Project ở
ap-southeast-1(hoặc region khác):- Phải chuyển hoặc sao chép dữ liệu
gold/vàartifacts/sang bucket ở region đó hoặc cấu hình Cross-Region Replication (CRR). - Tạo KMS keys tương ứng và cập nhật policies/roles cho bucket mới.
- Phải chuyển hoặc sao chép dữ liệu
Nếu bạn muốn giữ Project trong ap-southeast-1, đây là ví dụ lệnh để tạo bucket và sao chép dữ liệu (PowerShell / CloudShell):
# Tạo bucket mới ở ap-southeast-1
aws s3 mb s3://mlops-retail-prediction-dev-842676018087-apse1 --region ap-southeast-1

# Đồng bộ gold/ và artifacts/ sang bucket mới
aws s3 sync s3://mlops-retail-prediction-dev-842676018087/gold/ s3://mlops-retail-prediction-dev-842676018087-apse1/gold/ --acl bucket-owner-full-control --exact-timestamps
aws s3 sync s3://mlops-retail-prediction-dev-842676018087/artifacts/ s3://mlops-retail-prediction-dev-842676018087-apse1/artifacts/ --acl bucket-owner-full-control --exact-timestamps

# (Optional) Tạo KMS key ở ap-southeast-1 và cập nhật bucket policy / IAM role
# aws kms create-key --region ap-southeast-1 --description "KMS for mlops retail ap-southeast-1"
Ghi chú:
- Nếu bucket nguồn dùng SSE-KMS, đảm bảo bạn tạo tương ứng KMS key ở region đích và cập nhật cả bucket policy và role
mlops-retail-prediction-dev-sagemaker-execution. - Nếu muốn resolution nhanh và ít thay đổi IAM, chọn tạo Project/Domain ở
us-east-1(nơi bucket hiện có) — đây là phương án khuyến nghị cho lab và chạy training nhanh.
3. ETL - Chuẩn bị dữ liệu trong SageMaker Studio
🎯 Mục tiêu: Đọc TẤT CẢ shop_week partitions từ S3 silver/ và tạo train/test/validation splits
Input: silver/shop_week=200607/ đến silver/shop_week=200619/ (14 partitions)
Output: gold/train.parquet, gold/test.parquet, gold/validation.parquet
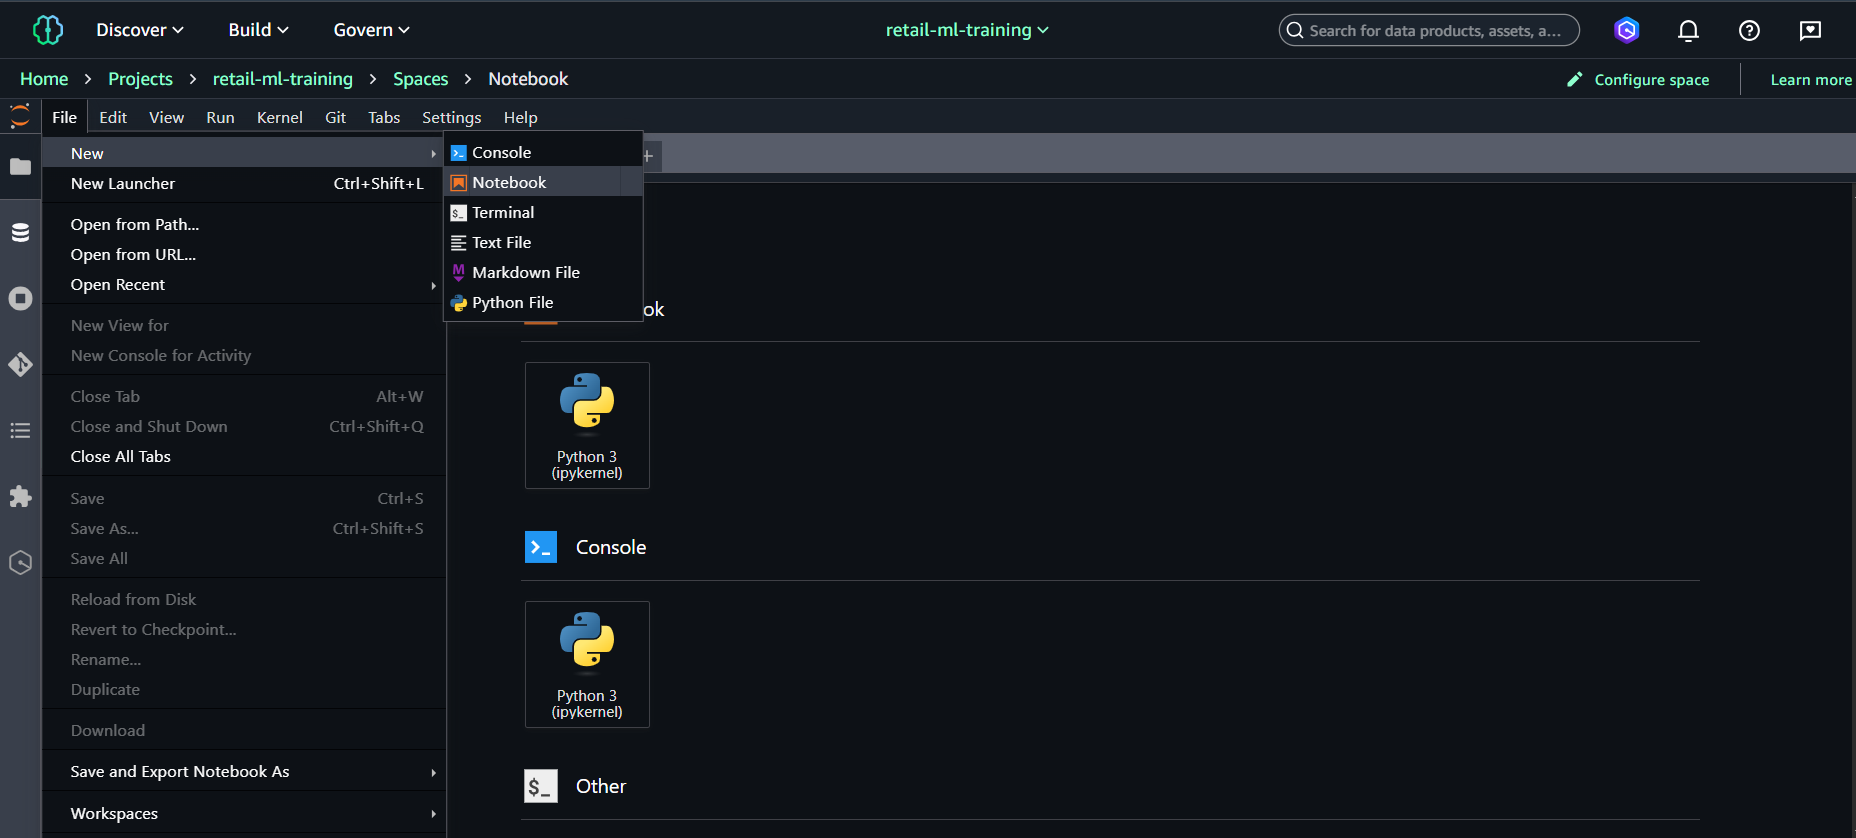
Bước 1: Tạo ETL Notebook trong Project
Từ Project overview:
- Click “New” dropdown → chọn “Notebook”
- Notebook sẽ mở trong browser tab mới
- Chọn kernel: Python 3 (Data Science 3.0)
- Đặt tên notebook: File → Rename →
retail-etl-pipeline.ipynb - Notebook sẽ tự động lưu vào S3 project path
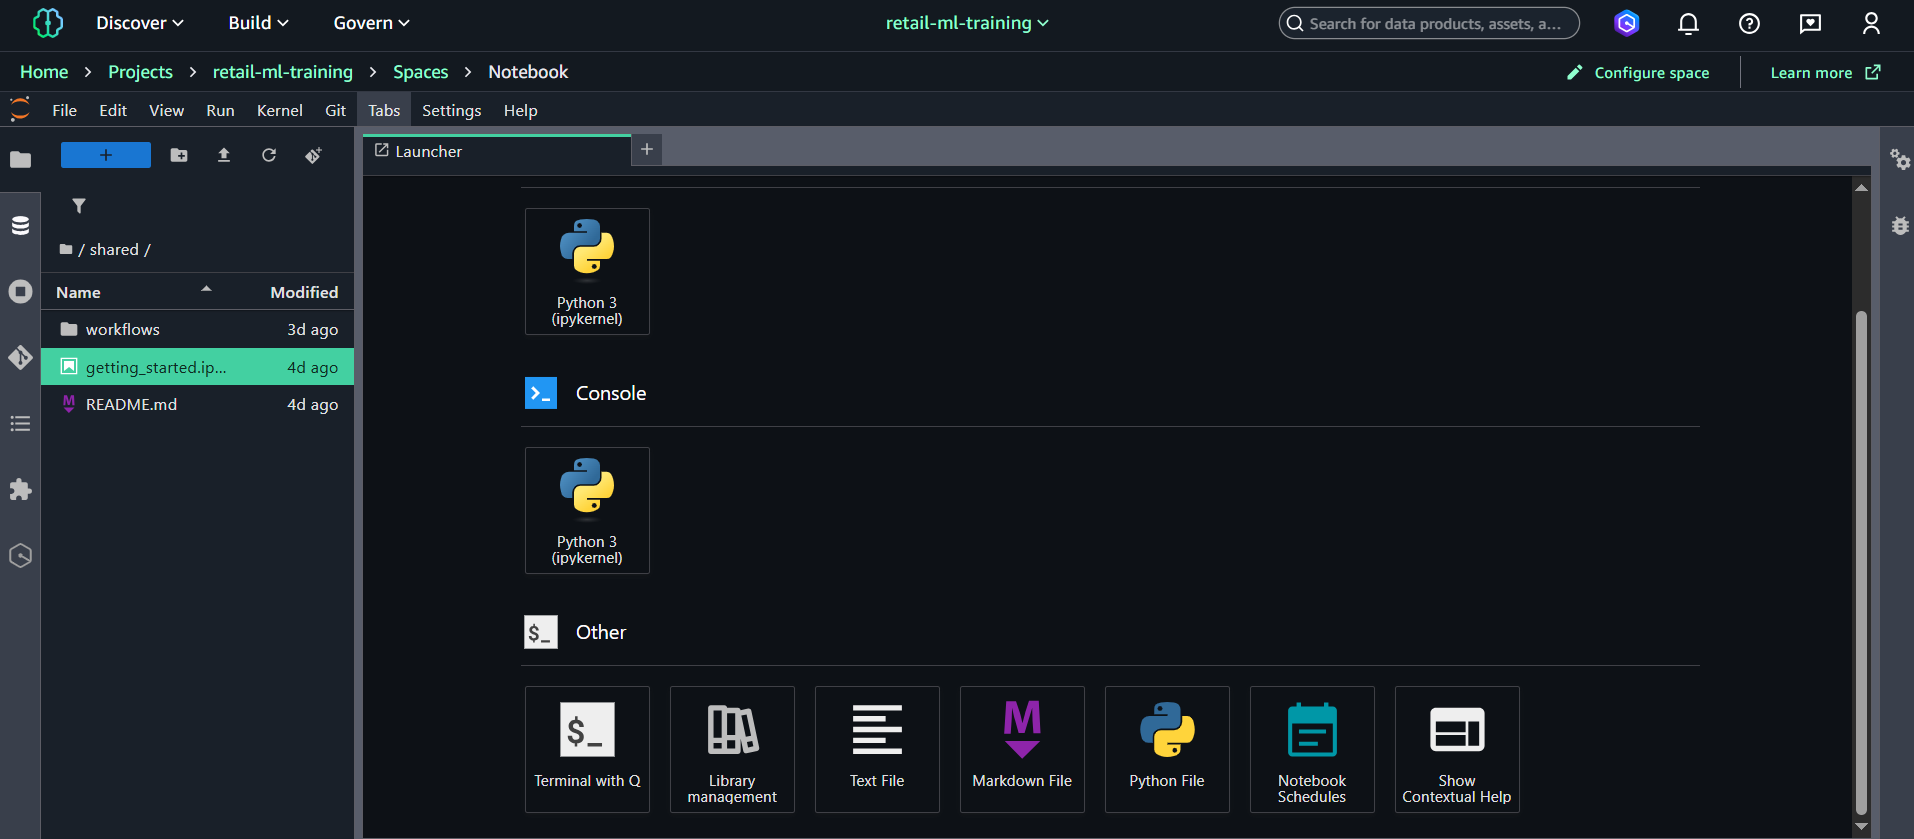
Lưu ý:
- Notebook chạy trên managed compute instance của SageMaker
- Files tự động sync với S3 project storage
- Có thể chia sẻ với team members trong project
Bước 2: Thực hiện ETL Pipeline
Tạo và chạy các cells sau theo thứ tự:
Cell 1: Cài đặt dependencies
# Install all required packages
pip install pandas pyarrow s3fs scikit-learn xgboost sagemaker boto3 joblib
Cell 2: Thiết lập cấu hình
import boto3
import pandas as pd
import numpy as np
from sklearn.model_selection import train_test_split
import json
from datetime import datetime

# Configuration - update bucket name theo project của bạn
# Nếu dùng project S3: amazon-sagemaker-[account-id]-ap-southeast-1-[random-id]
# Hoặc bucket từ Task 3: mlops-retail-prediction-dev-[account-id]
bucket_name = 'amazon-sagemaker-842676018087-ap-southeast-1-f6cd5056a835'  # <-- SỬA theo project của bạn
raw_prefix = 'silver/'
gold_prefix = 'gold/'

# Initialize AWS clients
s3 = boto3.client('s3')
print(f'✅ AWS clients initialized. Bucket: {bucket_name}')
Cell 3: Load dữ liệu từ tất cả partitions
print(f'📊 Loading all partitioned data from s3://{bucket_name}/{raw_prefix}...')

# Discover all parquet files in silver/
response = s3.list_objects_v2(Bucket=bucket_name, Prefix=raw_prefix)
parquet_files = [obj['Key'] for obj in response.get('Contents', [])
                if obj['Key'].endswith('.parquet') and obj['Size'] > 0]

print(f'📁 Found {len(parquet_files)} parquet files')

# Load all files into one DataFrame
all_dataframes = []
total_rows = 0

for i, key in enumerate(parquet_files[:10]):  # Limit to first 10 files for demo
    s3_path = f's3://{bucket_name}/{key}'

    try:
        df = pd.read_parquet(s3_path)
        all_dataframes.append(df)
        total_rows += len(df)
        print(f'  ✅ File {i+1}: {len(df):,} rows from {key.split("/")[-1]}')
    except Exception as e:
        print(f'  ❌ Failed to load {key}: {e}')

# Combine all data
combined_data = pd.concat(all_dataframes, ignore_index=True)
print(f'\n🎯 Combined dataset: {combined_data.shape}')
print(f'📋 Columns: {list(combined_data.columns)}')
Cell 4: Tạo features và target variable
print("📌 STEP 1 — Columns in combined_data:")
print(list(combined_data.columns))

# Force lowercase column names for safety
combined_data.columns = [c.lower() for c in combined_data.columns]
print("\n📌 STEP 2 — Columns after lowercase normalization:")
print(list(combined_data.columns))

print("\n📌 STEP 3 — Checking required columns...")

if 'basket_id' in combined_data.columns and 'spend' in combined_data.columns:
    print("✅ Found basket_id and spend — proceeding with basket-level feature engineering.")

    print("\n📌 STEP 4 — Converting numeric columns...")
    for col in ['spend', 'quantity']:
        if col in combined_data.columns:
            combined_data[col] = pd.to_numeric(combined_data[col], errors='coerce')
            print(f"  - Converted column '{col}' to numeric.")

    print("\n📌 STEP 5 — Starting groupby aggregation...")
    print("⚙️ Aggregating, this may take a moment...")

    features = combined_data.groupby('basket_id').agg({
        'spend': ['sum', 'mean', 'count'],
        'quantity': ['sum', 'mean'] if 'quantity' in combined_data.columns else []
    }).reset_index()

    print("✅ Aggregation complete.")
    print(f"📊 Features raw shape: {features.shape}")

    # Flatten column names
    print("\n📌 STEP 6 — Flattening column names...")
    features.columns = (
        ['basket_id', 'spend_sum', 'spend_mean', 'spend_count'] +
        (['quantity_sum', 'quantity_mean'] if 'quantity' in combined_data.columns else [])
    )
    print("📋 New feature columns:", list(features.columns))

    print("\n📌 STEP 7 — Creating price_sensitivity target variable...")
    median_spend = features['spend_sum'].median()
    print(f"Median spend = {median_spend}")

    features['price_sensitivity'] = (features['spend_sum'] > median_spend).astype(int)

else:
    print("❌ Could NOT find required columns for basket-level engineering.")
    print("Available columns:", list(combined_data.columns))

    print("\n📌 Fallback: Using transaction-level feature engineering...")
    features = combined_data.copy()

    if 'spend' in features.columns:
        features['price_sensitivity'] = (
            features['spend'] > features['spend'].median()
        ).astype(int)
        print("✅ Created price_sensitivity for transaction-level data.")
    else:
        raise RuntimeError("❌ spend column not found — cannot create price_sensitivity.")

print("\n📌 STEP 8 — Final feature table shape:")
print(features.shape)

print("\n📌 STEP 9 — Target distribution:")
print(features['price_sensitivity'].value_counts(dropna=False))

print("\n📌 STEP 10 — Sample output:")
print(features.head())
Cell 5: Tạo train/test/validation splits và lưu vào S3
print('📋 Creating train/test/validation splits...')

# Create stratified splits
train_data, temp_data = train_test_split(
    features, test_size=0.3, random_state=42,
    stratify=features['price_sensitivity']
)

test_data, val_data = train_test_split(
    temp_data, test_size=0.33, random_state=42,
    stratify=temp_data['price_sensitivity']
)

splits = {
    'train': train_data,
    'test': test_data,
    'validation': val_data
}

# Save to S3
print(f'💾 Saving splits to s3://{bucket_name}/{gold_prefix}...')

for split_name, split_data in splits.items():
    s3_path = f's3://{bucket_name}/{gold_prefix}{split_name}.parquet'
    split_data.to_parquet(s3_path, index=False)
    print(f'  ✅ {split_name}: {len(split_data):,} rows saved to {split_name}.parquet')

print('\n🎉 ETL Complete! Data ready for training.')

# Verify files created
response = s3.list_objects_v2(Bucket=bucket_name, Prefix=gold_prefix)
if 'Contents' in response:
    print(f'\n📁 Files in gold/:')
    for obj in response['Contents']:
        size_mb = obj['Size'] / (1024*1024)
        print(f'  📄 {obj["Key"]}: {size_mb:.2f} MB')
4. Training - Huấn luyện Model
🎯 Mục tiêu: Huấn luyện mô hình Random Forest để phân loại độ nhạy giá khách hàng
Input: S3 gold/train.parquet, gold/test.parquet, gold/validation.parquet
Output: Trained Random Forest model trong S3 artifacts/ với performance metrics
Bước 1: Tạo Training Notebook trong Project
- Trong Studio interface, click File → New → Notebook
- Chọn conda_python3 kernel (hoặc Python 3 (Data Science))
- Đặt tên notebook:
notebooks/retail-model-training.ipynb - Click Create
💡 Lưu ý: Notebook sẽ được lưu trong Project repository và có thể commit vào CodeCommit.
Bước 2: Thực hiện Model Training
Tạo và chạy các cells sau theo thứ tự:
Cell 1: Setup SageMaker Configuration
import sagemaker
import boto3
import os
from sagemaker.sklearn.estimator import SKLearn

# Initialize SageMaker session and get execution role
sagemaker_session = sagemaker.Session()
role = sagemaker.get_execution_role()

# Configuration - update bucket name if different
bucket_name = 'mlops-retail-prediction-dev-842676018087'
gold_prefix = 'gold/'
artifacts_prefix = 'artifacts/'

print(f'✅ SageMaker Role: {role}')
print(f'📊 Training Data: s3://{bucket_name}/{gold_prefix}')
print(f'📦 Model Artifacts: s3://{bucket_name}/{artifacts_prefix}')
Cell 2: Tạo Training Script
%%writefile train_retail_model.py
import pandas as pd
import joblib
import os
import json
from sklearn.model_selection import train_test_split
from sklearn.ensemble import RandomForestClassifier
from sklearn.metrics import accuracy_score, f1_score, precision_score, recall_score, classification_report

def main():
    # Đường dẫn chuẩn của SageMaker
    train_dir = os.environ.get("SM_CHANNEL_TRAIN", "/opt/ml/input/data/train")
    model_dir = os.environ.get("SM_MODEL_DIR", "/opt/ml/model")

    # 1. Load data
    train_path = os.path.join(train_dir, "train.parquet")
    print(f"📖 Loading training data from: {train_path}")
    df = pd.read_parquet(train_path)

    print(f"📊 Dataset shape: {df.shape}")
    print(f"📋 Columns: {list(df.columns)}")

    # 2. Chuẩn bị features & target
    target_col = "price_sensitivity" if "price_sensitivity" in df.columns else df.columns[-1]
    feature_cols = [c for c in df.columns if c not in [target_col, "basket_id"]]

    X = df[feature_cols]
    y = df[target_col]

    print(f"🔢 Features: {len(feature_cols)} columns")
    print(f"🎯 Target: {target_col}")
    print(f"📈 Target distribution: {dict(y.value_counts())}")

    # 3. Train/validation split (stratified)
    X_train, X_val, y_train, y_val = train_test_split(
        X, y, test_size=0.2, random_state=42, stratify=y
    )

    # 4. Train Random Forest model
    print("\n🌲 Training Random Forest model...")
    model = RandomForestClassifier(
        n_estimators=100,
        max_depth=10,
        min_samples_split=5,
        min_samples_leaf=2,
        random_state=42
    )

    model.fit(X_train, y_train)

    # 5. Evaluate model
    y_pred = model.predict(X_val)

    accuracy = accuracy_score(y_val, y_pred)
    f1 = f1_score(y_val, y_pred, average="macro")
    precision = precision_score(y_val, y_pred, average="macro")
    recall = recall_score(y_val, y_pred, average="macro")

    print(f"\n📊 Model Performance:")
    print(f"  ✅ Accuracy:  {accuracy:.4f}")
    print(f"  ✅ Precision: {precision:.4f}")
    print(f"  ✅ Recall:    {recall:.4f}")
    print(f"  ✅ F1-Score:  {f1:.4f}")

    # 6. Save model and results
    os.makedirs(model_dir, exist_ok=True)

    # Save Random Forest model
    model_path = os.path.join(model_dir, 'model.joblib')
    joblib.dump(model, model_path)
    print(f'🌲 Random Forest model saved: {model_path}')

    # Save training results
    results_path = os.path.join(model_dir, 'training_results.json')
    training_summary = {
        'model_name': 'RandomForest',
        'accuracy': float(accuracy),
        'precision': float(precision),
        'recall': float(recall),
        'f1_score': float(f1),
        'feature_count': len(feature_cols),
        'training_samples': len(X_train),
        'validation_samples': len(X_val),
        'feature_names': feature_cols,
        'classification_report': classification_report(y_val, y_pred, output_dict=True)

    with open(results_path, 'w') as f:
        json.dump(training_summary, f, indent=2)

    print(f'📋 Results saved: {results_path}')
    print(f'📦 Model artifacts: 1 model + 1 results file')

    # Validation checks
    target_accuracy = 0.80
    target_f1 = 0.70

    print(f'\n🎯 Performance Validation:')
    print(f'  📊 Accuracy ≥ {target_accuracy}: {"✅" if accuracy >= target_accuracy else "❌"} ({accuracy:.3f})')
    print(f'  📊 F1-Score ≥ {target_f1}: {"✅" if f1 >= target_f1 else "❌"} ({f1:.3f})')

if __name__ == '__main__':
    main()
'''

# Write training script to file
with open('train_retail_model.py', 'w') as f:
    f.write(train_script)
Cell 3: Submit SageMaker Training Job
print("🚀 Submitting SageMaker Training Job...")

# Pre-flight: kiểm tra region + data trong gold/
s3_client = boto3.client("s3")

bucket_location = s3_client.get_bucket_location(Bucket=bucket_name)
bucket_region = bucket_location["LocationConstraint"] or "us-east-1"
current_region = sagemaker_session.boto_region_name

print(f"📍 Bucket region:    {bucket_region}")
print(f"📍 SageMaker region: {current_region}")

# Kiểm tra cross-region issue
if bucket_region != current_region:
    print(f"⚠️ Region mismatch detected!")
    print(f"   Bucket: {bucket_name} in {bucket_region}")
    print(f"   SageMaker: {current_region}")
    print(f"   This may cause S3 301 redirect errors during training")
    print(f"   Consider using project bucket in same region or configure cross-region access")

    # Option 1: Use project bucket in same region
    print(f"\n💡 Option 1: Use project bucket (same region):")
    print(f"   bucket_name = '{project_bucket}'")
    print(f"   (But need to copy gold/ data to this bucket first)")

    # Option 2: Continue with cross-region
    print(f"\n💡 Option 2: Continue with cross-region (may need additional config)")

    # For demo, we'll continue but warn user
    import warnings
    warnings.warn(f"Cross-region S3 access: {bucket_region} -> {current_region}")
else:
    print(f"✅ Same region - no cross-region issues")

train_s3_uri = f"s3://{bucket_name}/{gold_prefix}"

resp = s3_client.list_objects_v2(Bucket=bucket_name, Prefix=gold_prefix)
data_files = [o["Key"] for o in resp.get("Contents", []) if o["Key"].endswith(".parquet")]

if not data_files:
    raise ValueError(f"❌ No .parquet files found in {train_s3_uri}. Run ETL trước đã.")

print(f"✅ Found {len(data_files)} training files in {train_s3_uri}")

# Cấu hình estimator
estimator = SKLearn(
    entry_point="train_retail_model.py",
    role=role,
    instance_type="ml.m5.xlarge",
    instance_count=1,
    framework_version="1.0-1",
    py_version="py3",
    base_job_name="retail-prediction-training",
    sagemaker_session=sagemaker_session,
)

print(f"📊 Training data location: {train_s3_uri}")

# Chạy training job
estimator.fit({"train": train_s3_uri}, wait=True)

job_name = estimator.latest_training_job.name
model_artifacts = estimator.model_data

print("\n🎉 Training job completed!")
print("📝 Job name:       ", job_name)
print("💾 Model artifacts:", model_artifacts)

except Exception as e:
    print(f'❌ Pre-flight check failed: {e}')
    print('💡 Solutions:')
    print('  1. Run ETL notebook first to create gold/ data')
    print('  2. Make sure you ran debug cell (Bước 4) to fix regions')
    print('  3. Check IAM role has S3 access')
    raise

# Configure estimator for Unified Studio project
estimator = SKLearn(
    entry_point='train_retail_model.py',
    role=role,
    instance_type='ml.m5.xlarge',  # Larger instance for better performance
    instance_count=1,
    framework_version='1.0-1',
    py_version='py3',
    base_job_name='retail-prediction-training',
    sagemaker_session=sagemaker_session,
    # Output path sẽ được set tự động vào project S3 location
    output_path=f's3://{bucket_name}/{artifacts_prefix}'
)

print(f'📊 Training data location: {train_s3_uri}')

# Start training job with error handling
try:
    print('⏳ Starting training job (this will take 5-10 minutes)...')
    estimator.fit({'train': train_s3_uri}, wait=True)

    # Get job results
    job_name = estimator.latest_training_job.name
    model_artifacts = estimator.model_data

    print(f'\\n🎉 Training job completed!')
    print(f'📝 Job name: {job_name}')
    print(f'💾 Model artifacts: {model_artifacts}')

except Exception as e:
    print(f'❌ Training job failed: {e}')
    print('💡 Troubleshooting:')
    print('  - Check CloudWatch logs for detailed error')
    print('  - Verify IAM role permissions')
    print('  - Ensure training data format is correct')
    raise
Cell 4: Download & Đọc Training Results
import os
import tarfile
import json
import boto3

print("📊 Analyzing training results...")

# model_artifacts lấy từ Cell 3 (estimator.model_data)
print("📦 Artifact path:", model_artifacts)

# Tách bucket + key
art_parts = model_artifacts.replace("s3://", "").split("/", 1)
art_bucket = art_parts[0]
art_key = art_parts[1]

s3 = boto3.client("s3")

# Tải file model.tar.gz về local
local_tar = "model.tar.gz"
s3.download_file(art_bucket, art_key, local_tar)
print("📥 Downloaded", local_tar)

# Giải nén vào thư mục model_artifacts/
extract_dir = "model_artifacts"
os.makedirs(extract_dir, exist_ok=True)

with tarfile.open(local_tar, "r:gz") as tar:
    tar.extractall(extract_dir)

print("\n📂 Files inside model:")
print(os.listdir(extract_dir))

# Đọc training_results.json
results_path = os.path.join(extract_dir, "training_results.json")
with open(results_path, "r") as f:
    results = json.load(f)

print("\n🌲 RANDOM FOREST TRAINING RESULTS:")
print(f"  🤖 Model:      {results['model_name']}")
print(f"  📊 Accuracy:   {results['accuracy']:.4f}")
print(f"  📊 Precision:  {results['precision']:.4f}")
print(f"  📊 Recall:     {results['recall']:.4f}")
print(f"  📊 F1-Score:   {results['f1_score']:.4f}")
print(f"  🔢 Features:   {results['feature_count']}")
print(f"  📚 Train rows: {results['training_samples']:,}")
print(f"  🧪 Val rows:   {results['validation_samples']:,}")

print("\n📋 Per-class Performance:")
class_report = results['classification_report']
for class_name, metrics in class_report.items():
    if isinstance(metrics, dict) and 'f1-score' in metrics:
        print(f"  {class_name:>12}: Precision={metrics['precision']:.3f}, Recall={metrics['recall']:.3f}, F1={metrics['f1-score']:.3f}")

# Validate target
acc_target = 0.80
f1_target = 0.70

print("\n🎯 Performance validation:")
print(f"  📊 Accuracy ≥ {acc_target}: {'✅' if results['accuracy'] >= acc_target else '❌'} ({results['accuracy']:.3f})")
print(f"  📊 F1-score ≥ {f1_target}: {'✅' if results['f1_score'] >= f1_target else '❌'} ({results['f1_score']:.3f})")
Kết quả

✅ Training Hoàn thành! Model đạt target performance và sẵn sàng cho Model Registry.
5. Monitoring & Results
5.1. Theo dõi Training Job trong Studio
Trong SageMaker Studio (Unified Studio):
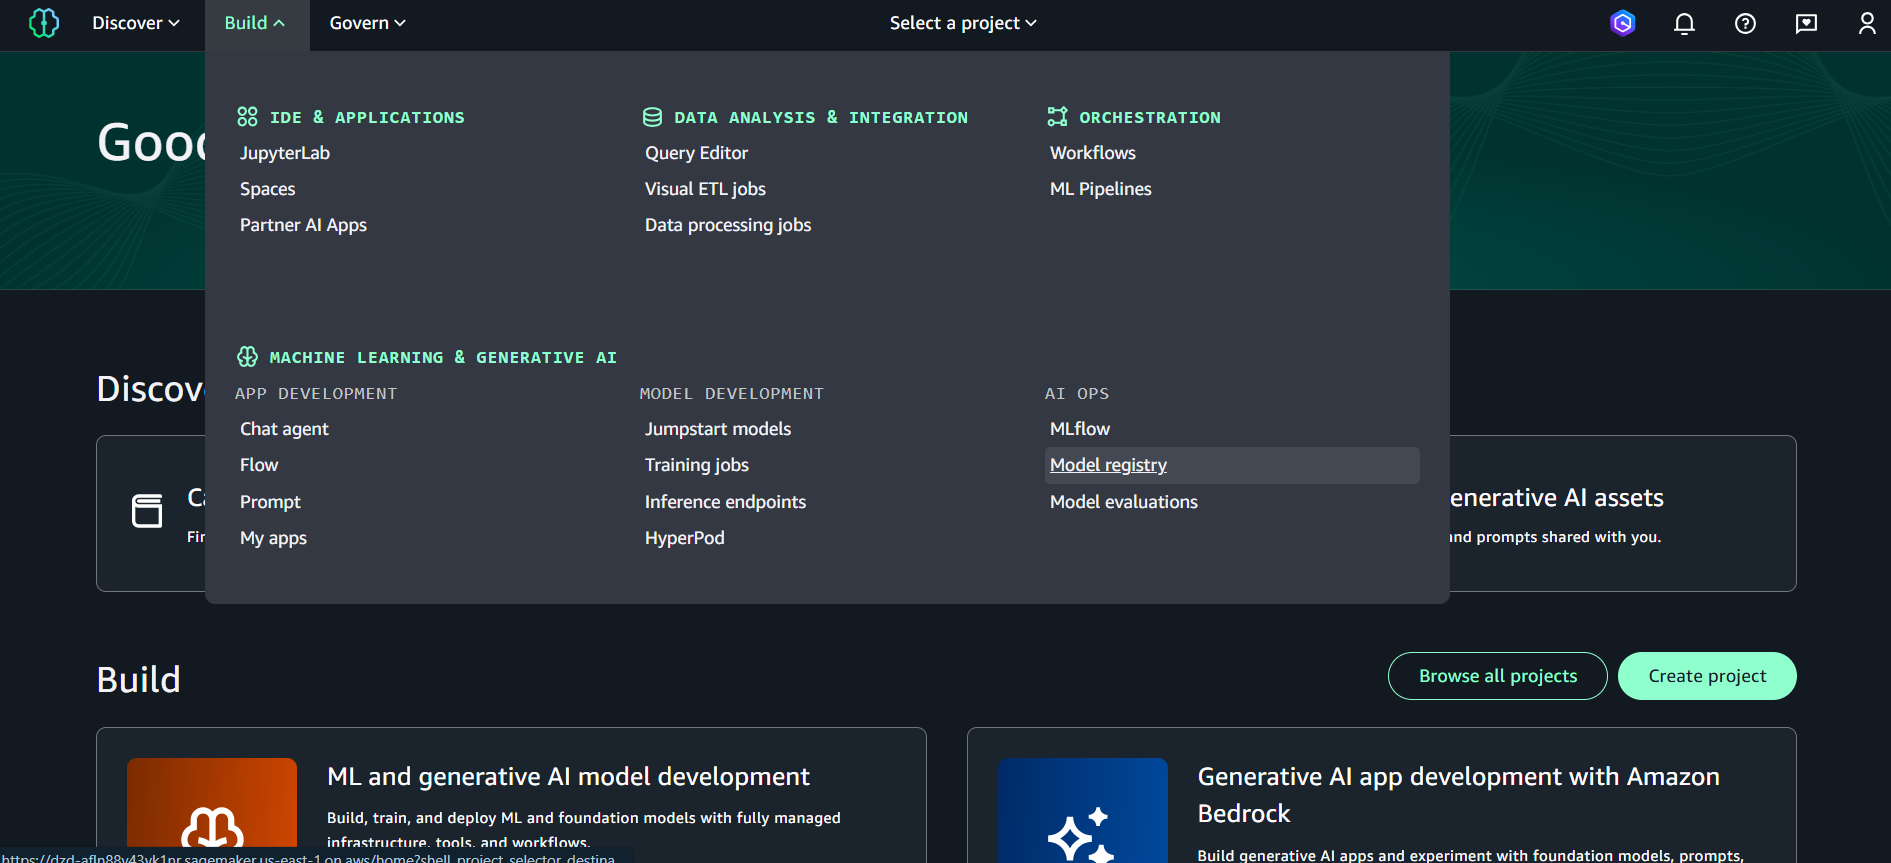
-
Mở mục Build ở thanh bên trái
-
Chọn Training jobs
-
Tìm job có tên bắt đầu bằng: retail-prediction-training-
-
Nhấp vào tên Training Job để mở chi tiết
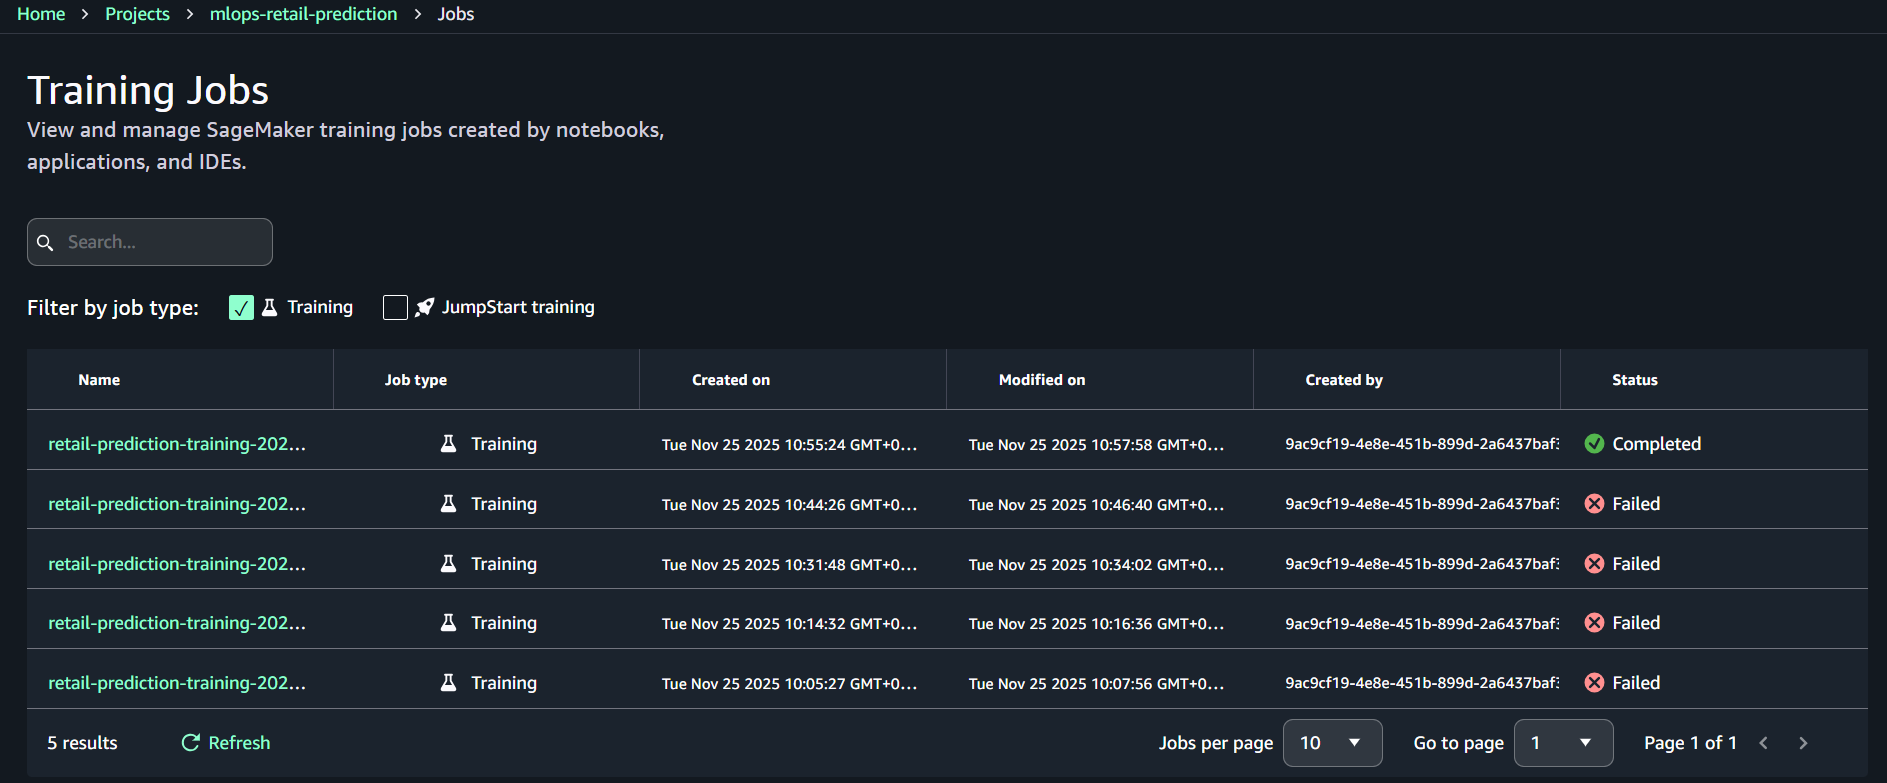
-
Chọn tab Logs để xem log real-time
-
(Tùy chọn) Bấm “Open in CloudWatch” để xem log đầy đủ
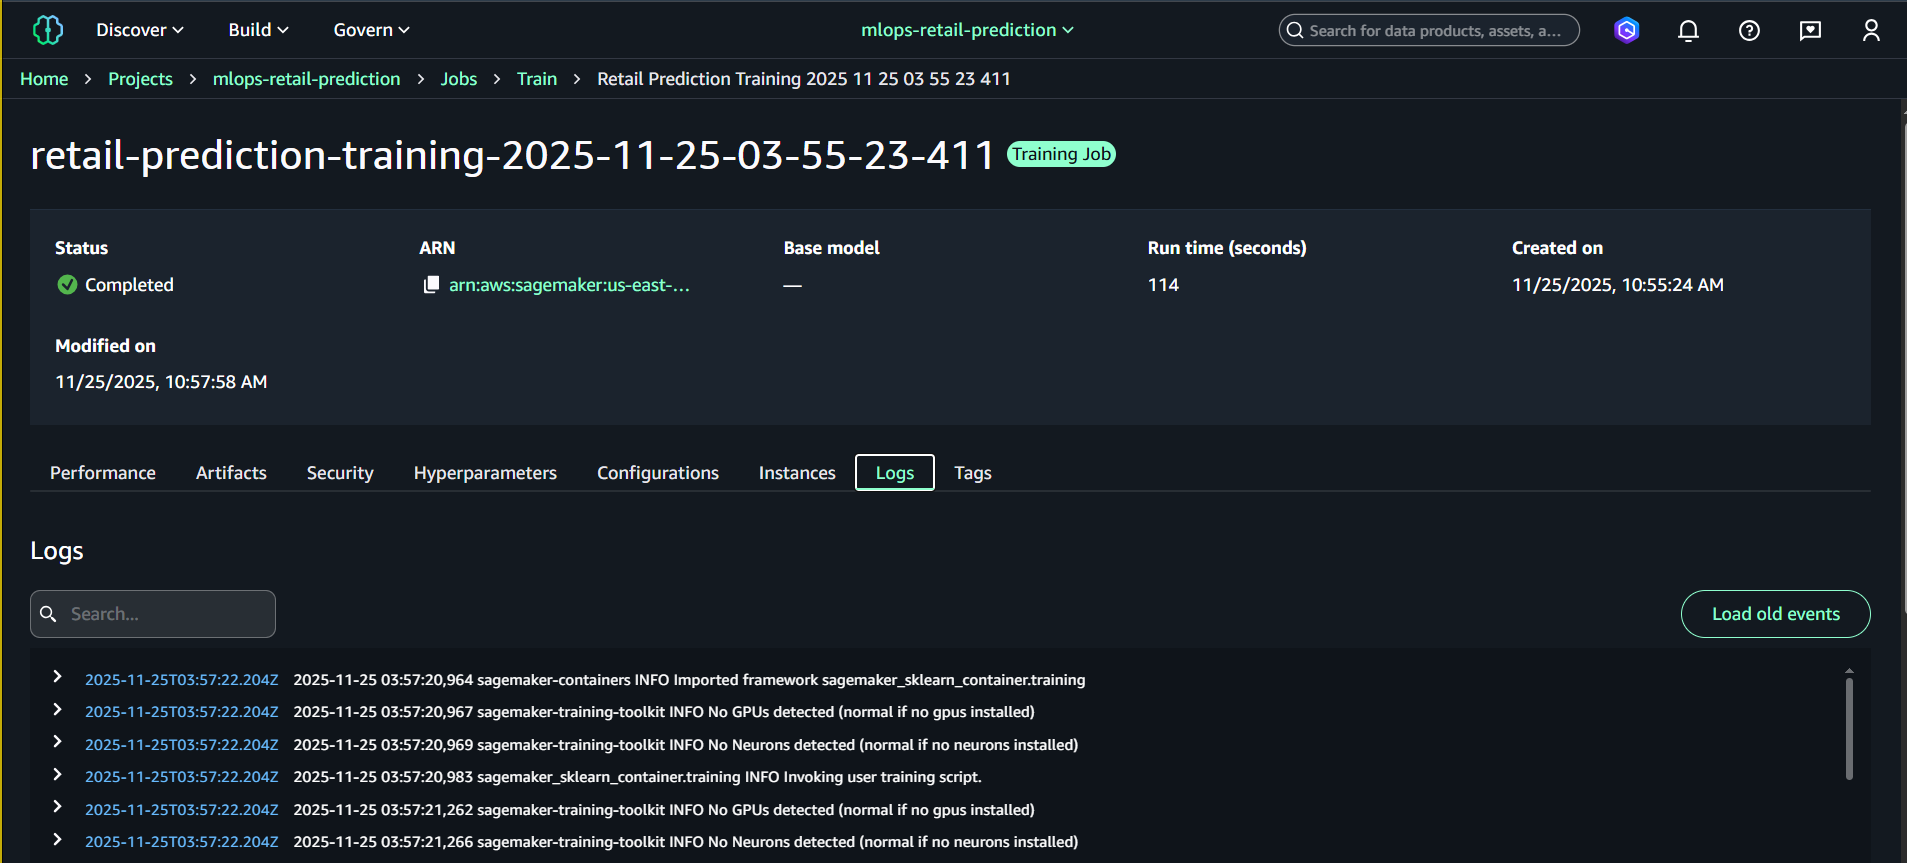
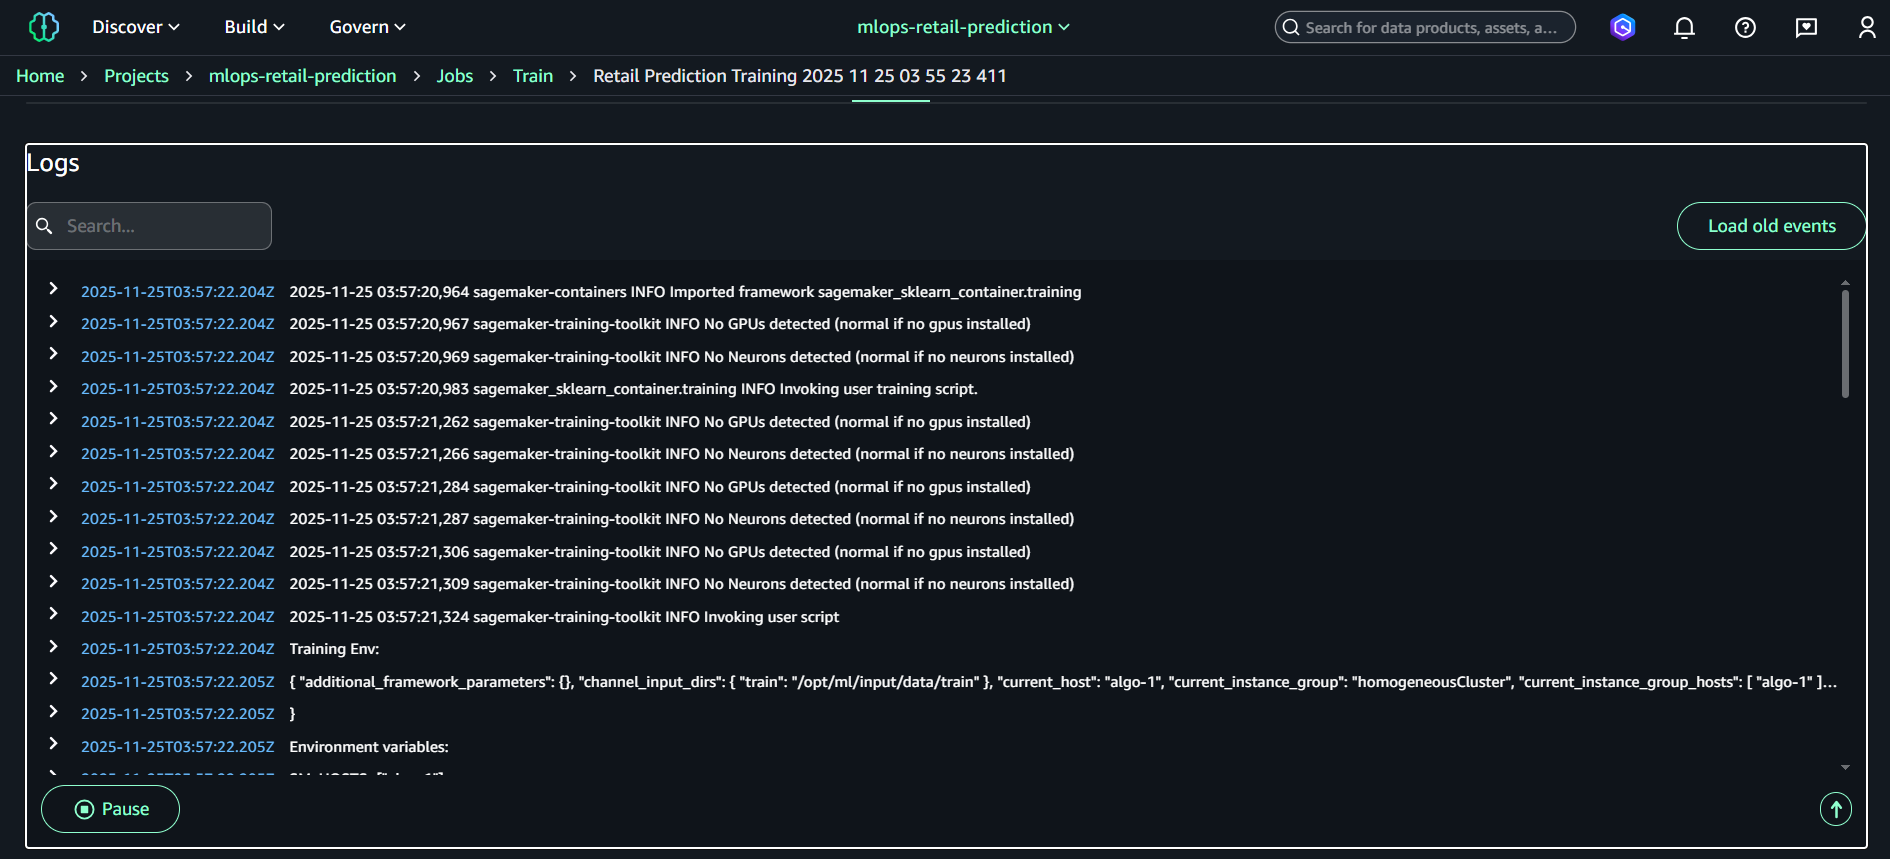
Info:
CloudWatch logs cho Training Job được lưu dưới dạng: /aws/sagemaker/TrainingJobs/
6. Model Registry (Giao diện mới trong Project)
Sau khi training job hoàn thành và tạo ra model.tar.gz, bước tiếp theo là đăng ký mô hình trong Model Registry.
Ở giao diện SageMaker Unified Studio mới, Model Registry nằm bên trong từng Project, không còn tách riêng như trước.
6.1. Mở Model Registry trong Project
SageMaker Studio → Projects → mlops-retail-prediction → Models → Registered models
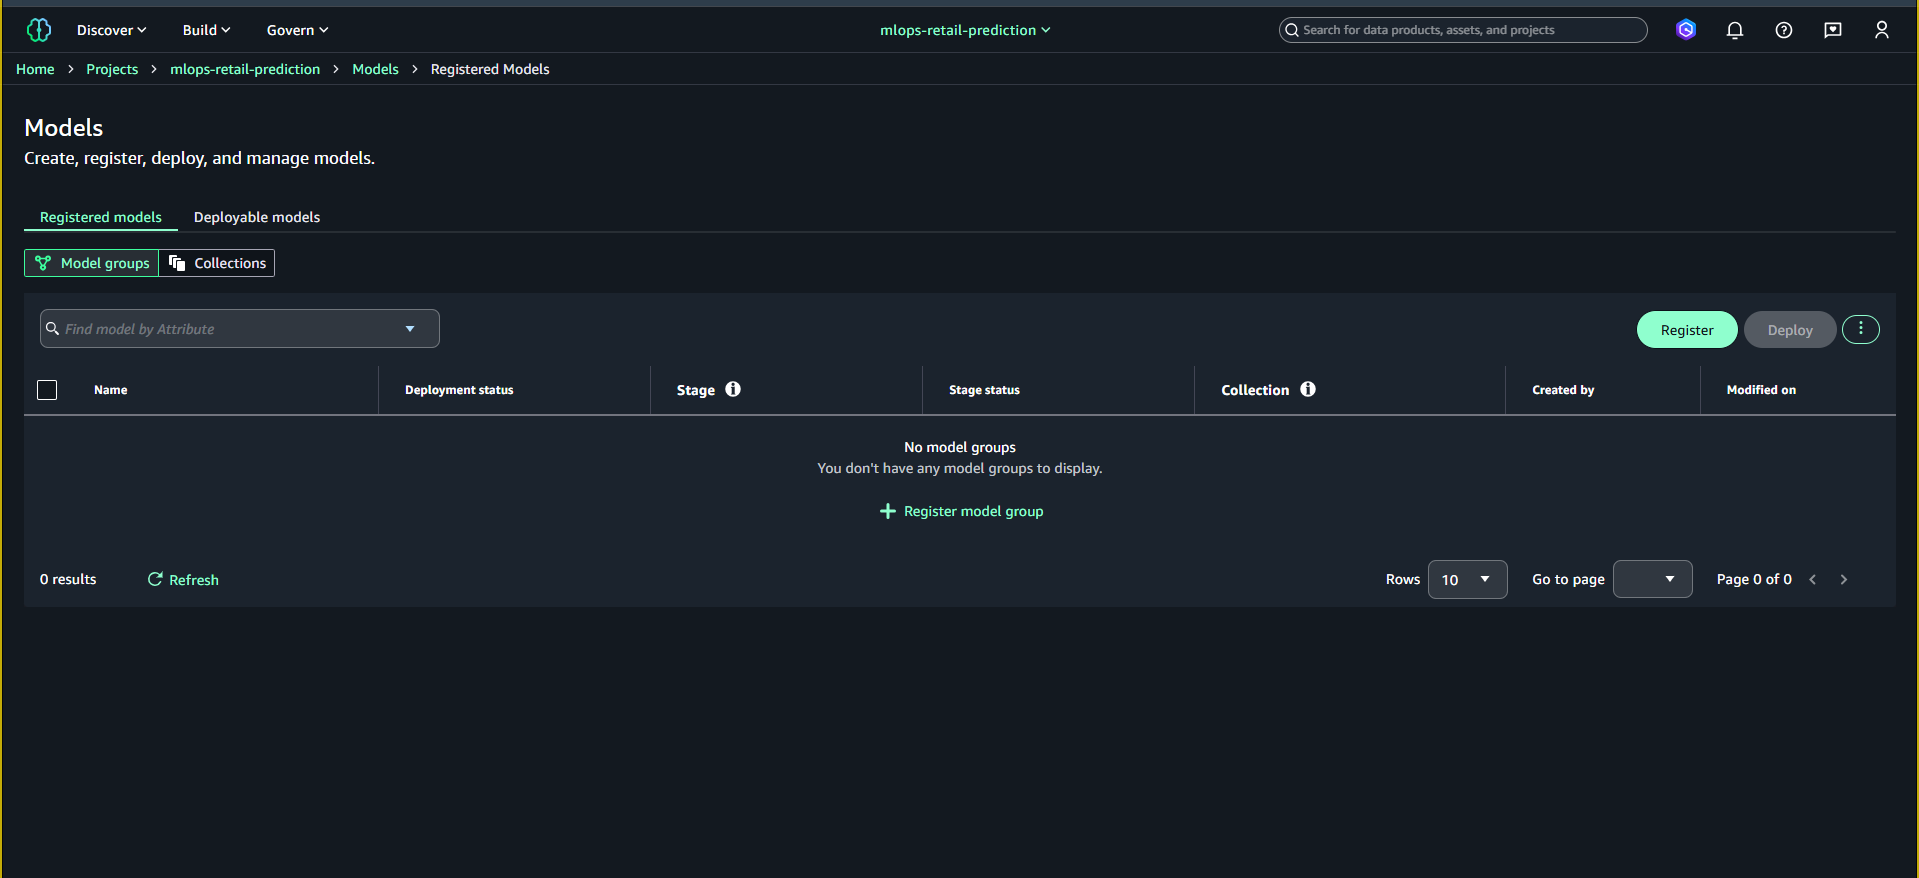
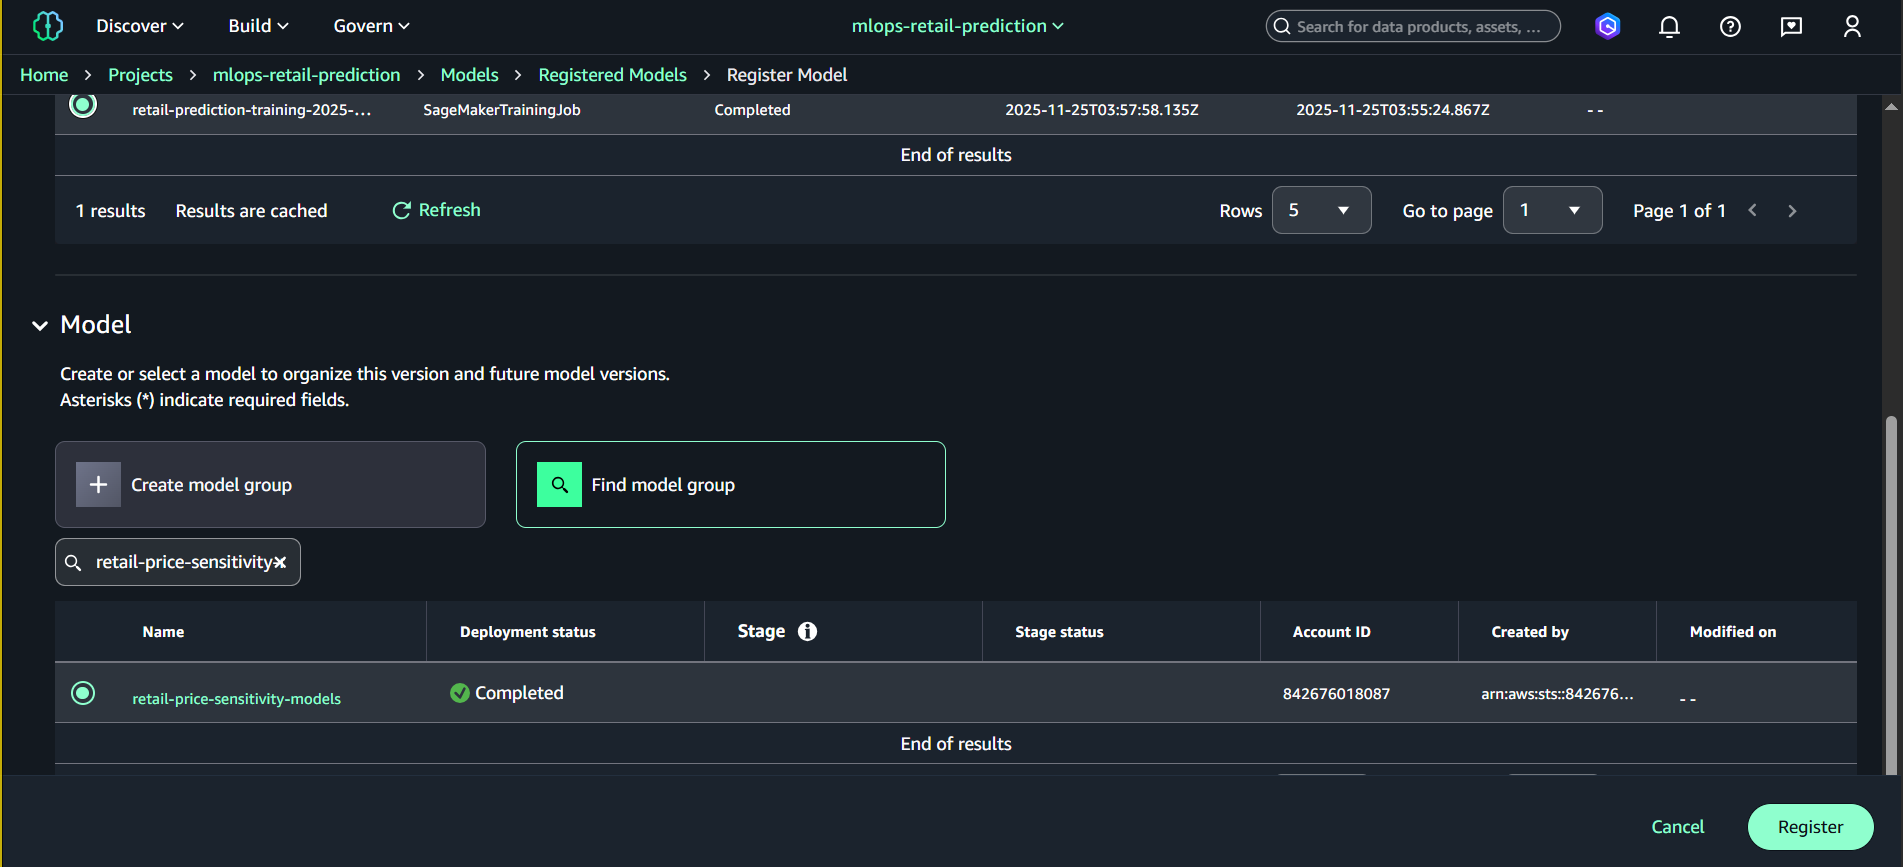
6.2. Tạo Model Group
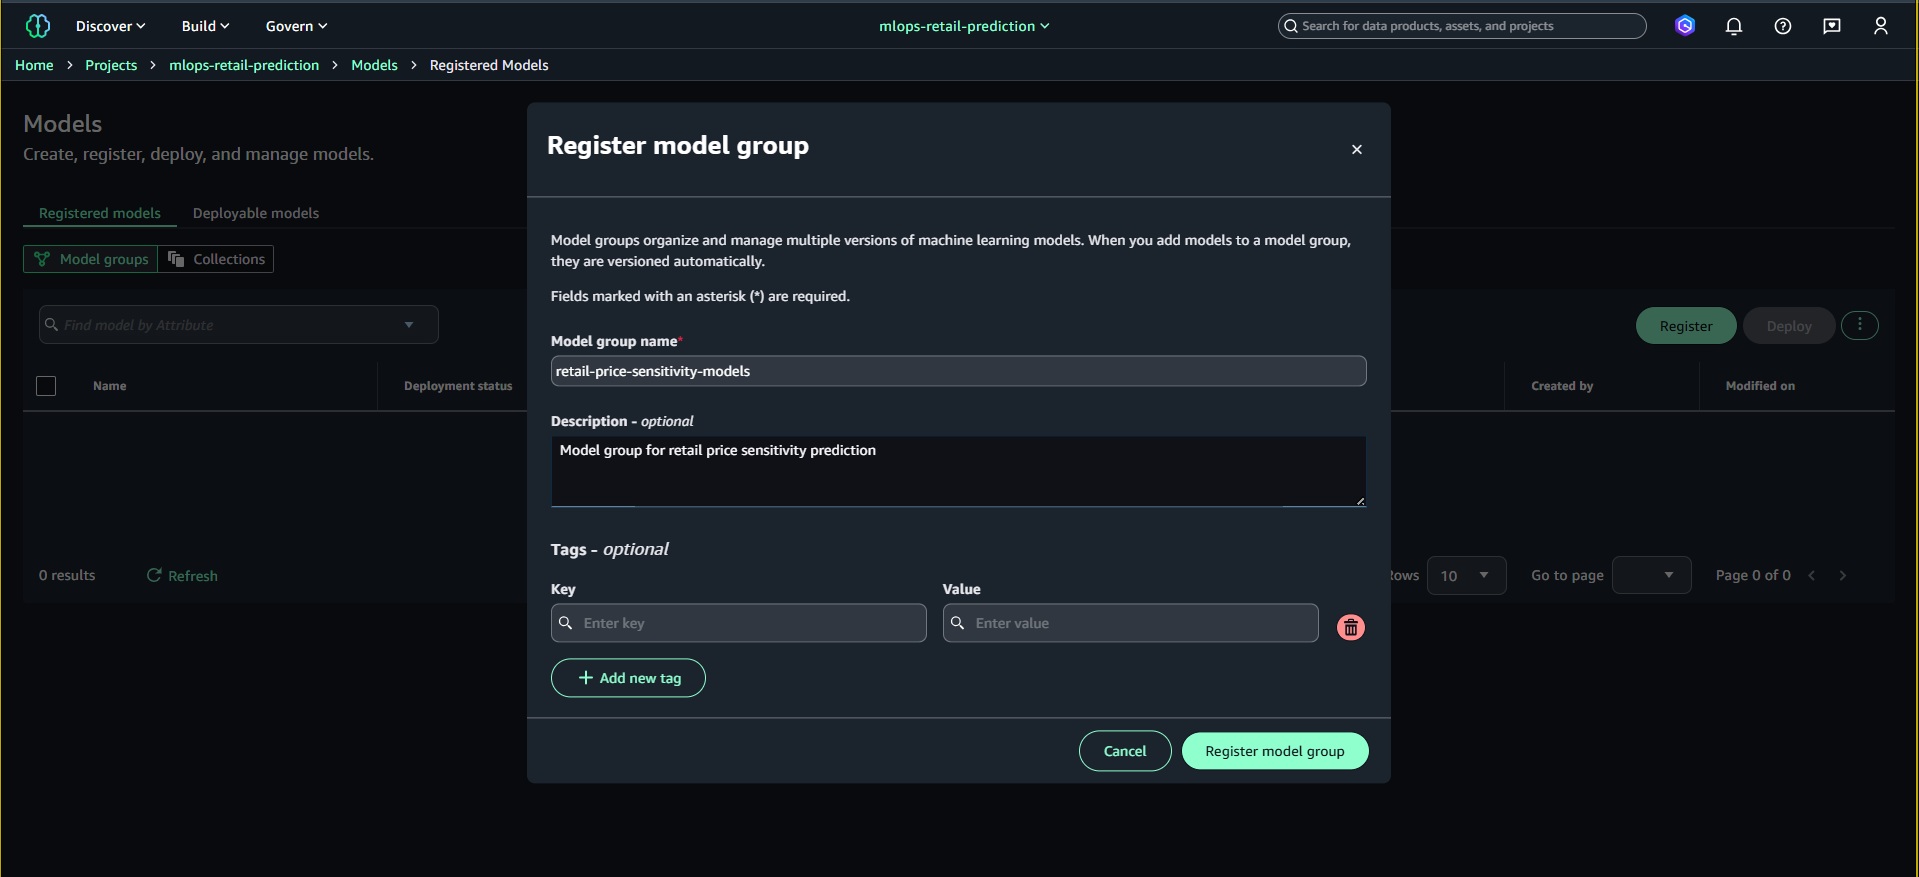
- Bấm Register model group
- Điền:
- Name:
retail-price-sensitivity-models - Description:
Model group for retail price sensitivity prediction
- Name:
- Nhấn Register model group
Model Group sẽ xuất hiện trong danh sách.

6.3. Đăng ký Model Version sau khi Training
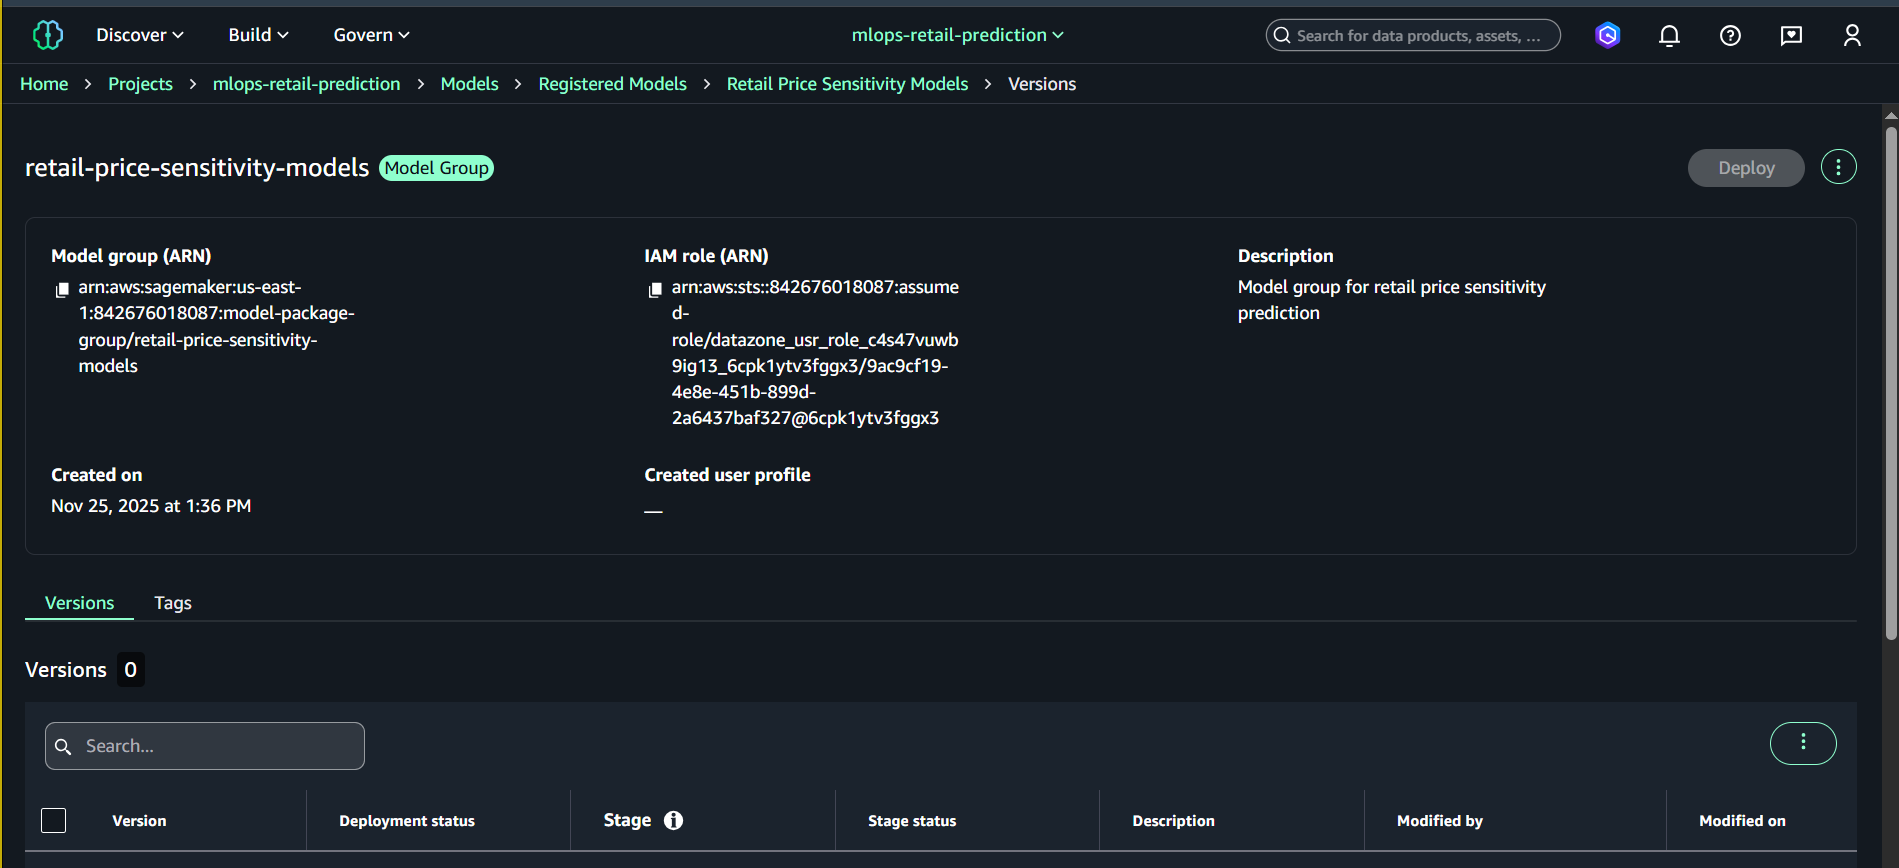
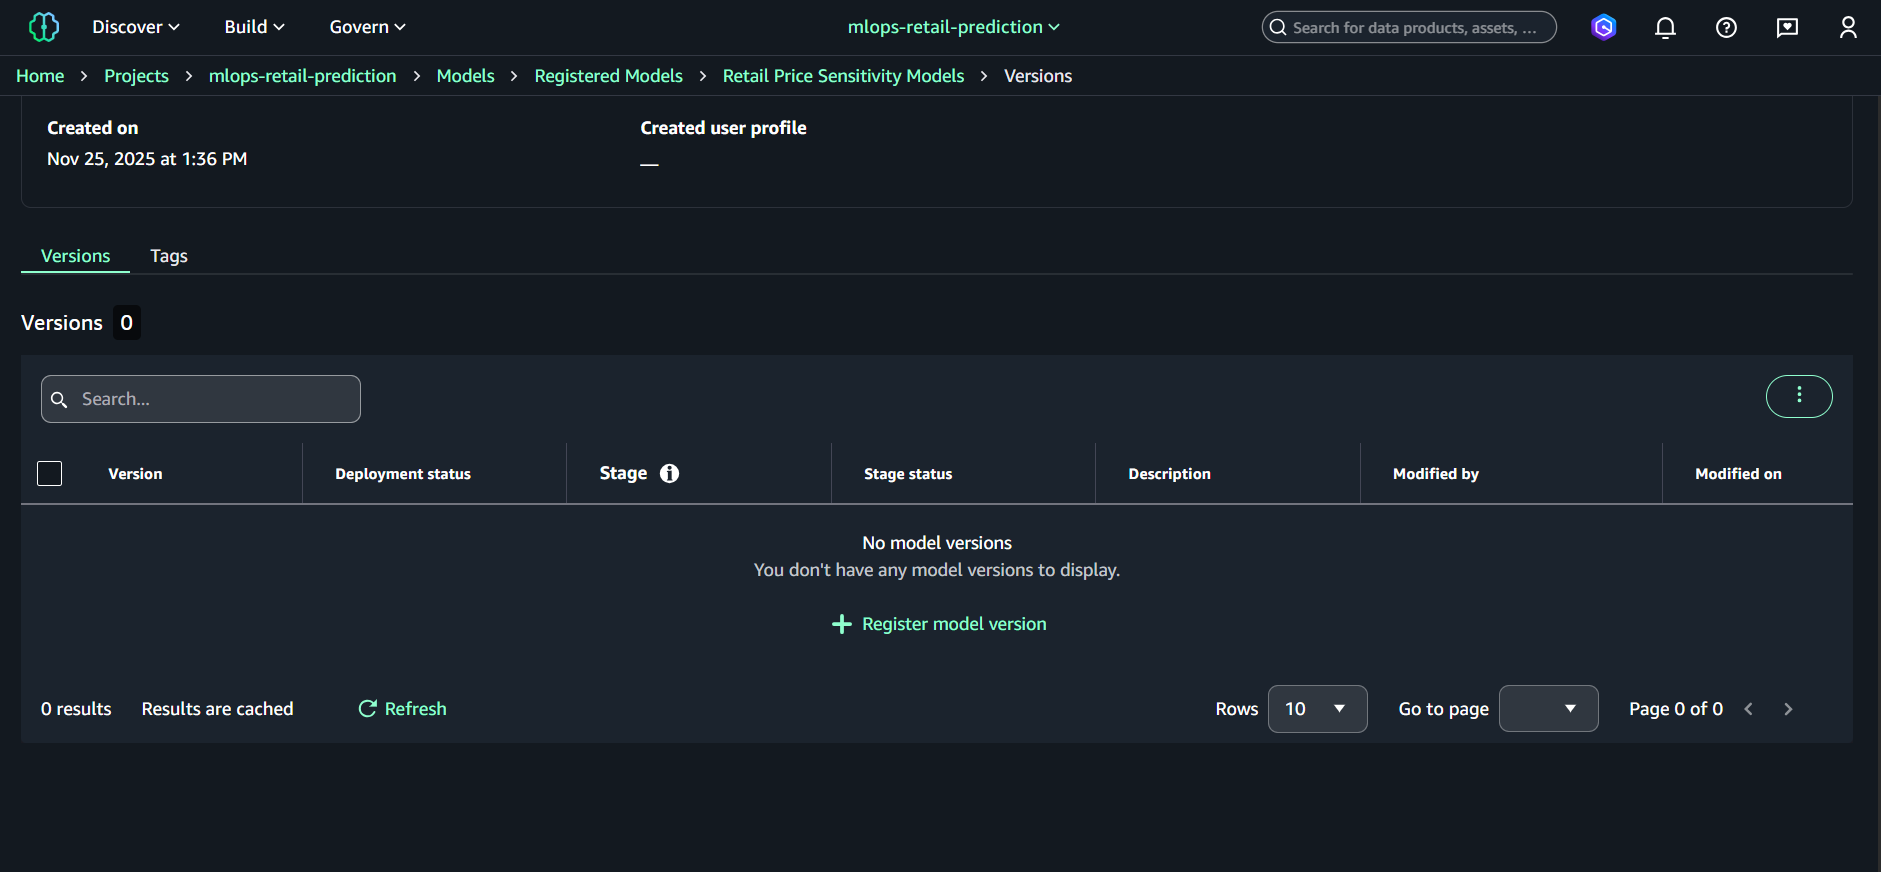
- Vào Models → Registered models versions → Model groups
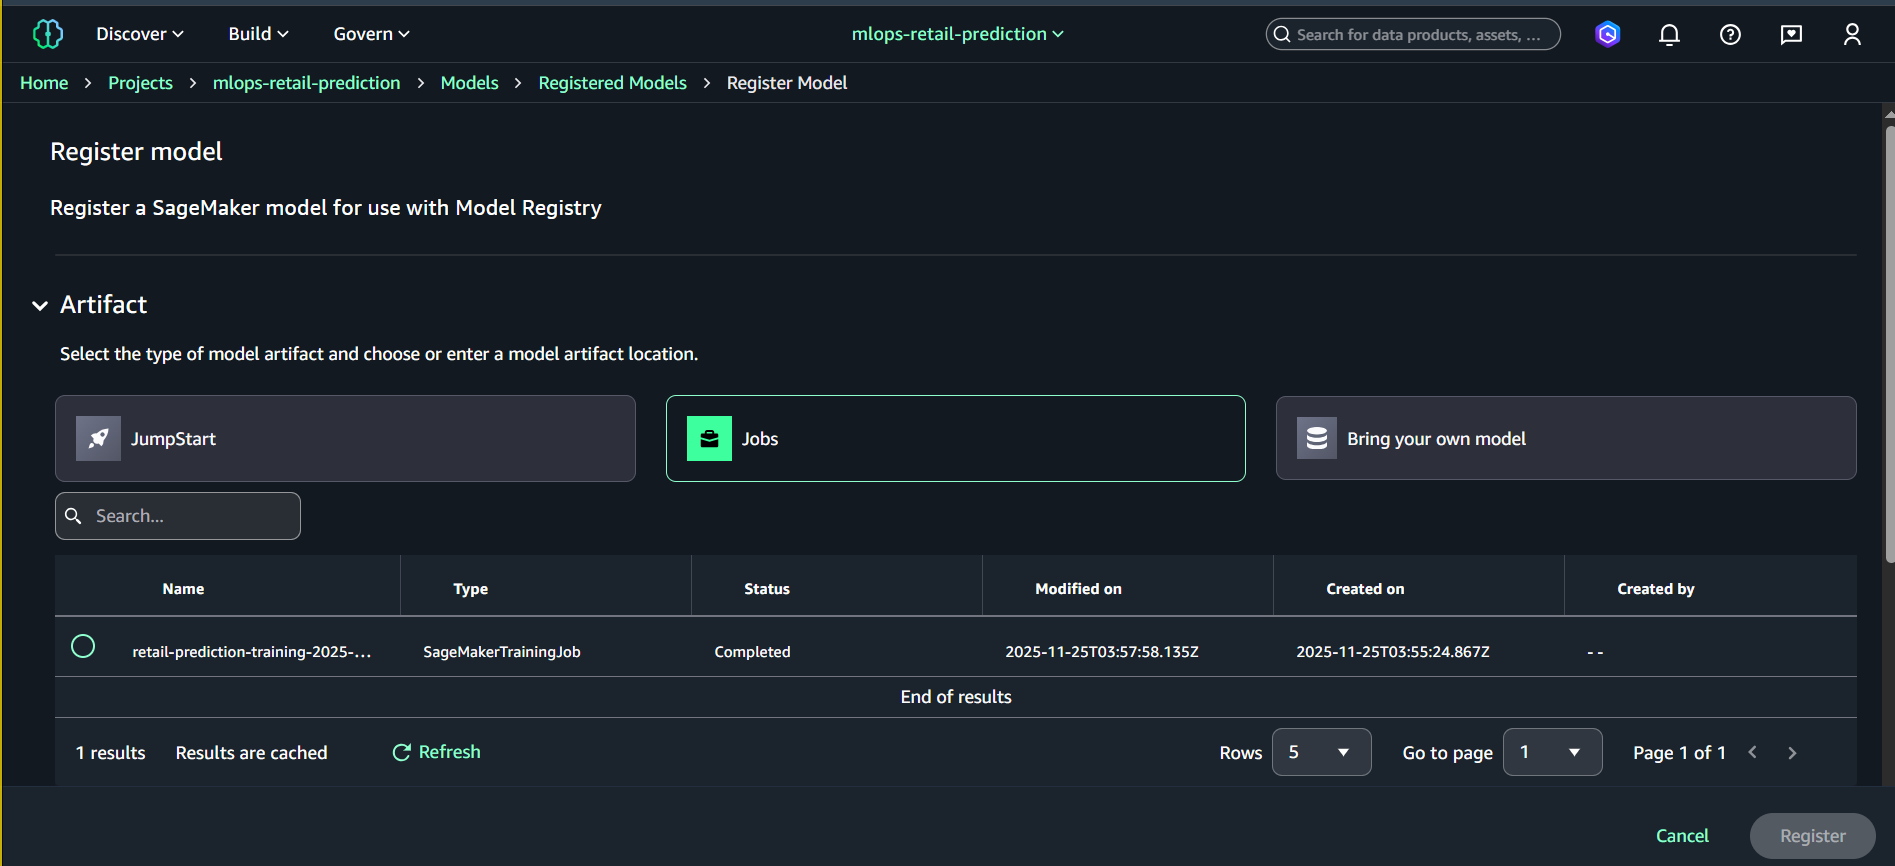
- Chọn nhóm: retail-price-sensitivity-models
- Nhấn Register model
- Nhập thông tin:
- Model artifact location (S3)
Ví dụ:s3://amazon-sagemaker-842676018087-us-east-1-xxxx/output/model.tar.gz - Version description:
Retail prediction model v1.0 - Approval status:
Pending manual approval
- Model artifact location (S3)
- Nhấn Register
Một Model Version mới sẽ được tạo.
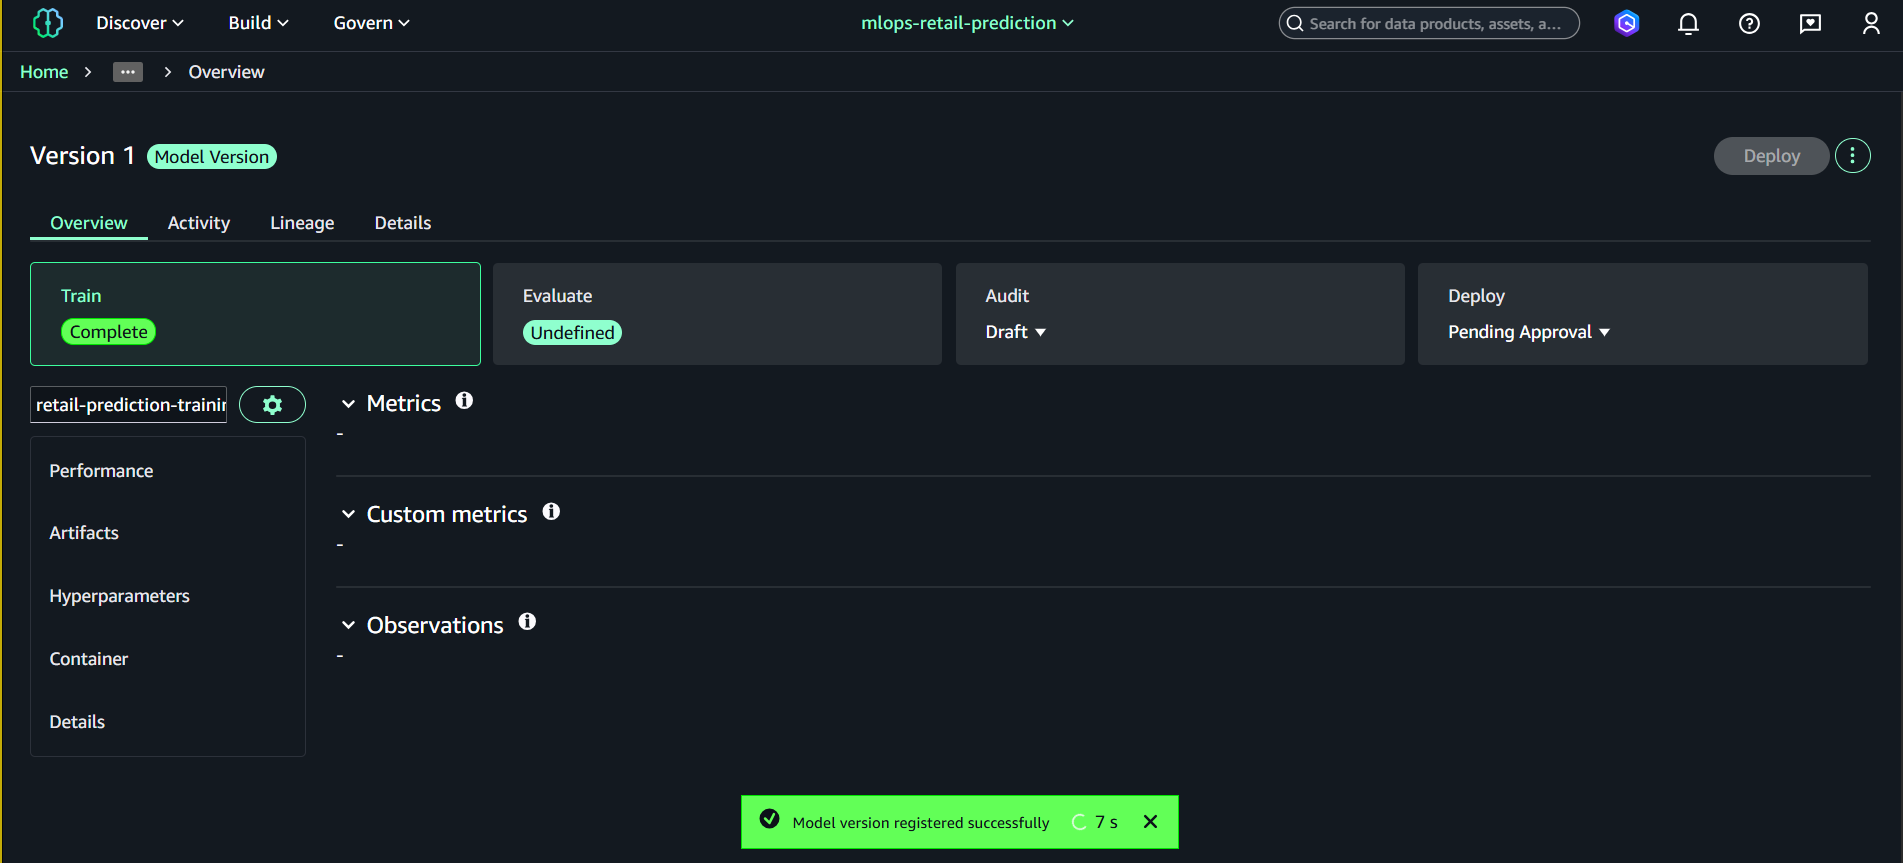
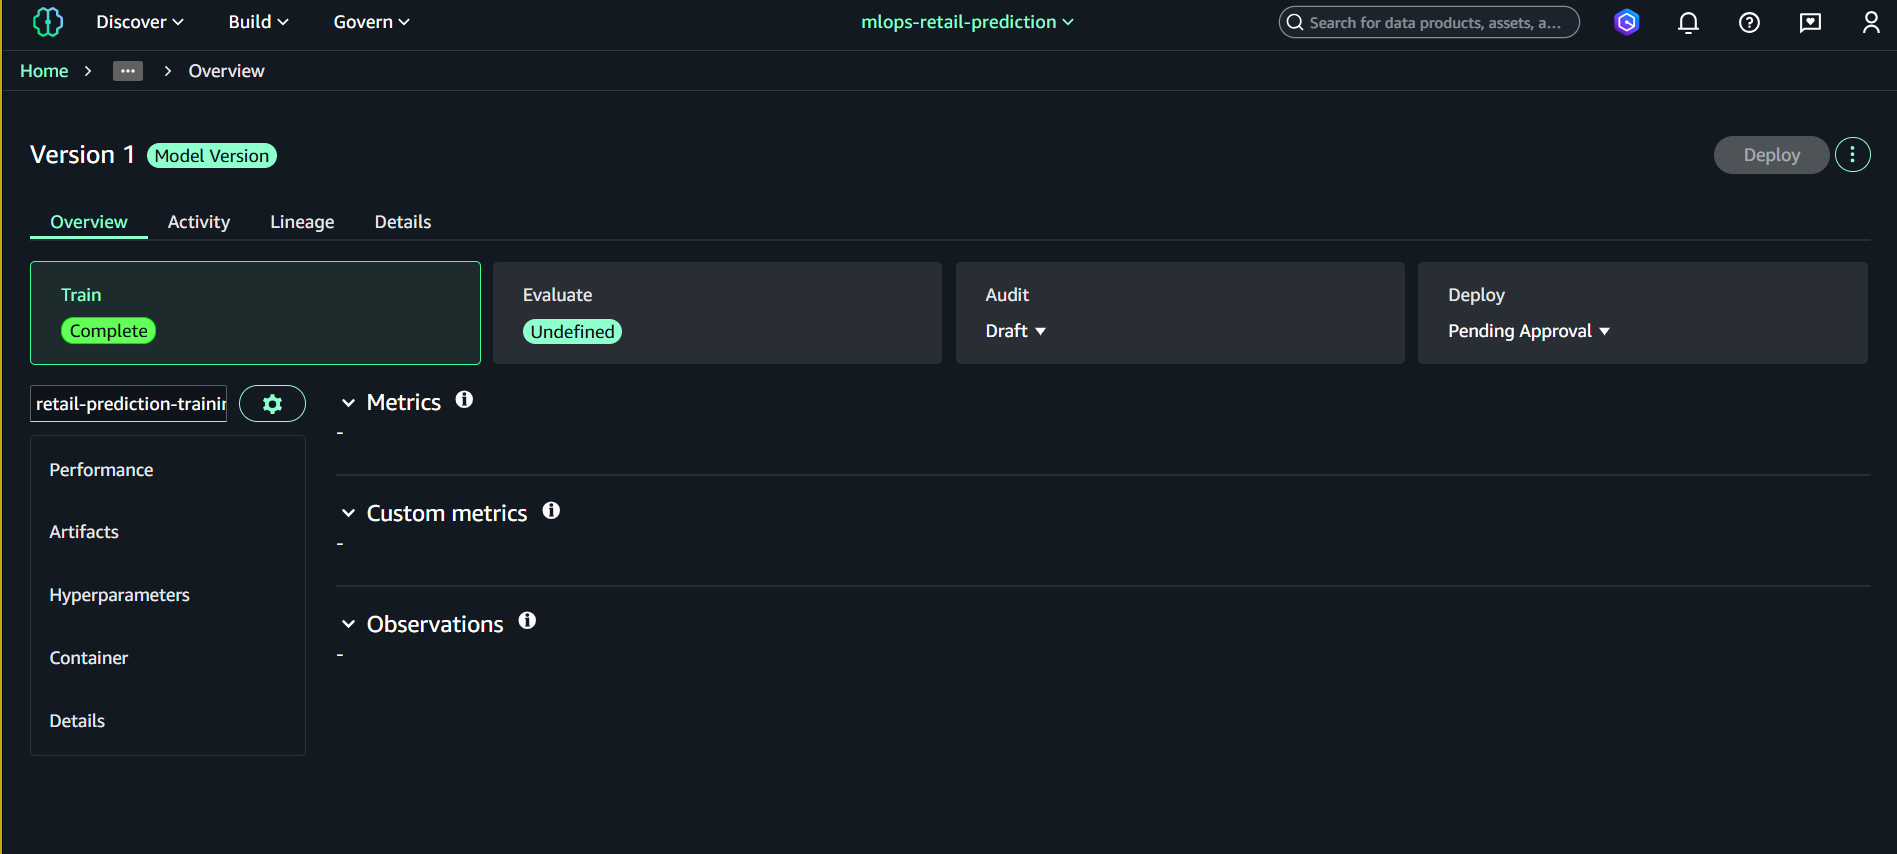
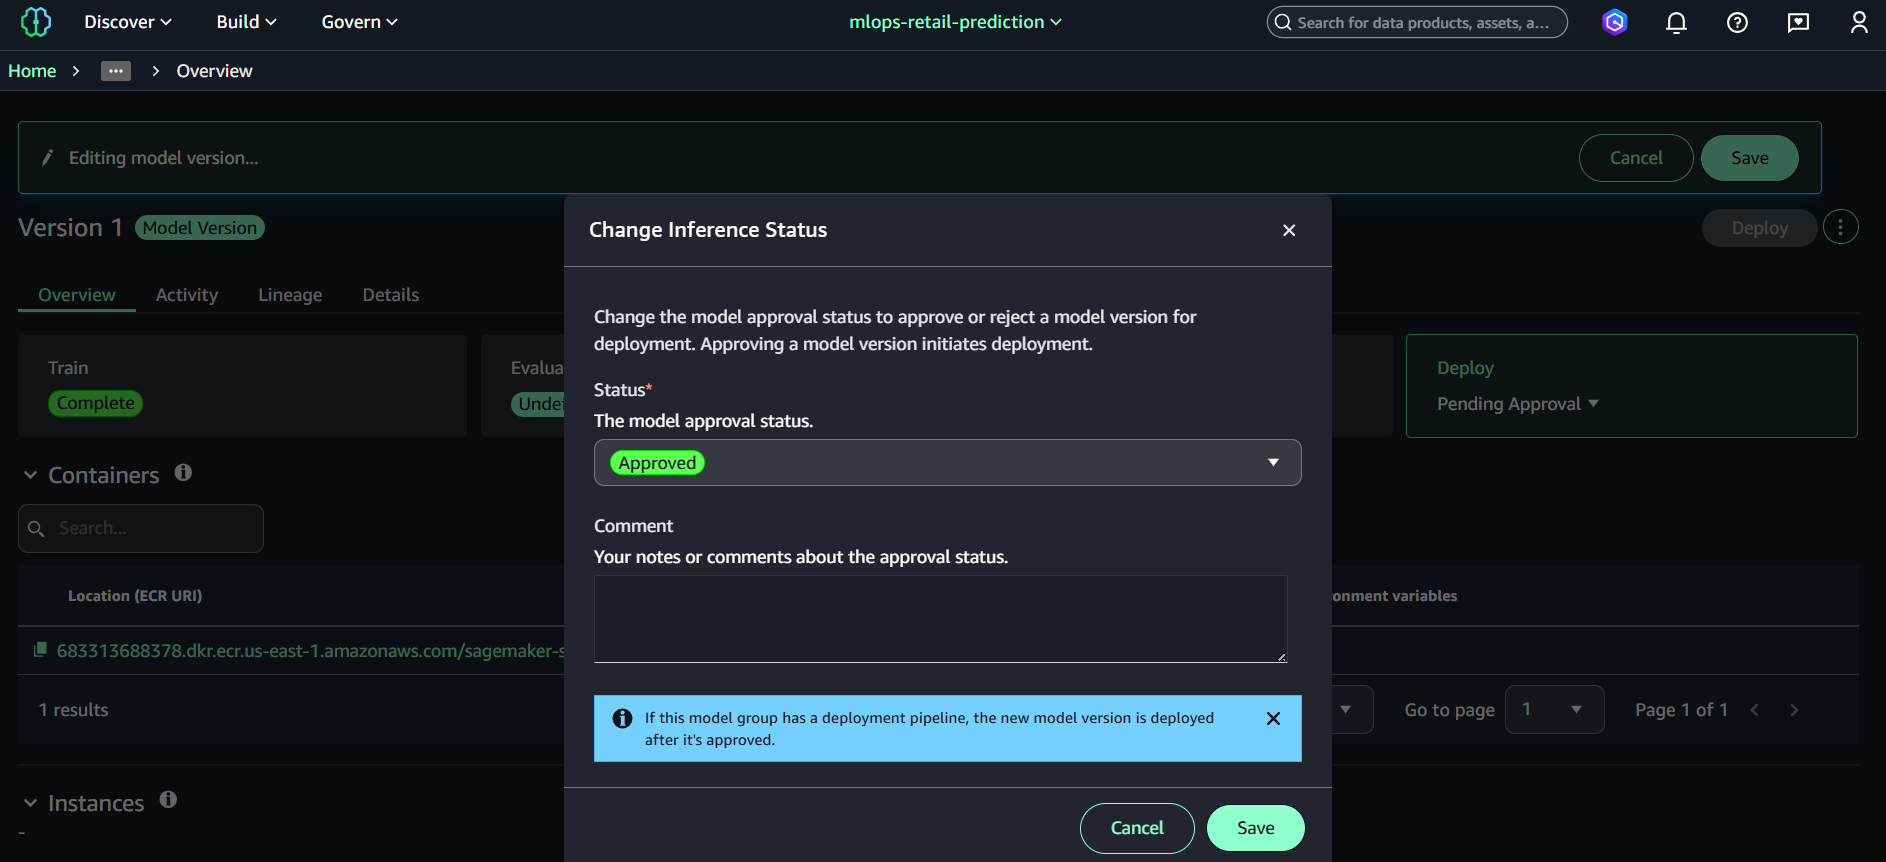
6.4. Approve Model Version
- Mở Model group → retail-price-sensitivity-models
- Chọn Version 1
- Nhấn Update status
- Đặt:
- Approved
- Save
Hoàn thành Task 4
📁 Notebook thực thi: notebooks/sagemaker-retail-etl-training.ipynb
Đã thành công:
- ✅ Tạo SageMaker Domain và cấu hình
- ✅ Tạo Project và mở Studio workspace
- ✅ ETL toàn bộ dataset - All shop_week partitions → Gold Parquet
- ✅ Auto-detect partitions - Scan tất cả shop_week có sẵn
- ✅ Train Random Forest với optimal hyperparameters
- ✅ Chọn single model focus để tối ưu performance
- ✅ Spot instances - Cost optimization với auto-scaling
- ✅ Complete notebook - 4 cells với detailed logging
7. Clean Up Resources (AWS CLI)
7.1. Xóa SageMaker Training Jobs
# Liệt kê training jobs
aws sagemaker list-training-jobs --name-contains "retail-prediction-training" --query 'TrainingJobSummaries[*].[TrainingJobName,TrainingJobStatus]' --output table

# Dừng training job đang chạy (nếu có)
aws sagemaker stop-training-job --training-job-name <job-name>

# Training jobs tự động cleanup sau khi hoàn thành (không cần xóa manual)
7.2. Xóa Model Registry
# Liệt kê model packages
aws sagemaker list-model-packages --model-package-group-name retail-price-sensitivity-models --query 'ModelPackageSummaryList[*].[ModelPackageArn,ModelPackageStatus]' --output table

# Xóa từng model package version
aws sagemaker delete-model-package --model-package-name <model-package-arn>

# Xóa model package group
aws sagemaker delete-model-package-group --model-package-group-name retail-price-sensitivity-models
7.3. Xóa SageMaker Domain và Project
# Liệt kê domains
aws sagemaker list-domains --query 'Domains[*].[DomainId,DomainName,Status]' --output table

# Xóa user profiles trước
aws sagemaker list-user-profiles --domain-id <domain-id> --query 'UserProfiles[*].UserProfileName' --output text

# Xóa từng user profile
aws sagemaker delete-user-profile --domain-id <domain-id> --user-profile-name <user-profile-name>

# Xóa domain (sau khi xóa hết user profiles)
aws sagemaker delete-domain --domain-id <domain-id>
7.4. Clean Up S3 Artifacts
# Xóa model artifacts
aws s3 rm s3://amazon-sagemaker-<account-id>-<region>-<random-id>/artifacts/ --recursive

# Xóa gold datasets
aws s3 rm s3://amazon-sagemaker-<account-id>-<region>-<random-id>/gold/ --recursive

# Kiểm tra project bucket còn gì
aws s3 ls s3://amazon-sagemaker-<account-id>-<region>-<random-id>/ --recursive
7.5. Xóa CloudWatch Logs
# Liệt kê log groups của SageMaker
aws logs describe-log-groups --log-group-name-prefix "/aws/sagemaker/TrainingJobs" --query 'logGroups[*].logGroupName'

# Xóa training job logs
aws logs delete-log-group --log-group-name "/aws/sagemaker/TrainingJobs/retail-prediction-training-<timestamp>"
8. Bảng giá SageMaker
8.1. Chi phí Training Instances
| Instance Type | vCPU | RAM | Giá (USD/hour) | Phù hợp cho |
|---|---|---|---|---|
| ml.m5.large | 2 | 8 GB | $0.138 | Small datasets, prototyping |
| ml.m5.xlarge | 4 | 16 GB | $0.276 | Medium datasets (đã dùng) |
| ml.m5.2xlarge | 8 | 32 GB | $0.552 | Large datasets |
| ml.c5.xlarge | 4 | 8 GB | $0.238 | CPU-intensive training |
| ml.p3.2xlarge | 8 | 61 GB | $4.284 | GPU deep learning |
8.2. Chi phí SageMaker Studio
| Component | Giá (USD) | Ghi chú |
|---|---|---|
| Studio Notebooks | $0.0582/hour | ml.t3.medium default |
| Domain Setup | Free | One-time setup |
| Data Wrangler | $0.42/hour | Visual data prep |
| Processing Jobs | Instance pricing | Same as training |
8.3. Chi phí Model Registry & Endpoints
| Service | Giá (USD) | Ghi chú |
|---|---|---|
| Model Registry | Free | Model versioning |
| Real-time Endpoint | $0.076/hour | ml.t2.medium |
| Batch Transform | Instance pricing | Pay per job |
| Multi-model Endpoint | $0.076/hour + storage | Cost optimization |
8.4. Ước tính chi phí cho Task 4
Training Job thực tế:
- Instance: ml.m5.xlarge
- Duration: ~10-15 minutes
- Training cost: $0.276 × 0.25h = $0.07
SageMaker Studio:
- Notebook development: ~2 hours
- Instance: ml.t3.medium
- Studio cost: $0.0582 × 2h = $0.12
Storage & Model Registry:
- Model artifacts: ~50MB
- S3 storage: ~$0.001
- Model Registry: Free
Total chi phí Task 4:
| Component | Duration | Cost |
|---|---|---|
| Training (ml.m5.xlarge) | 15 mins | $0.07 |
| Studio Notebooks | 2 hours | $0.12 |
| S3 Storage | Monthly | $0.001 |
| Total | ≈ $0.19 |
So sánh với các options:
| Approach | Instance | Duration | Cost | Performance |
|---|---|---|---|---|
| Current (ml.m5.xlarge) | 4 vCPU, 16GB | 15 min | $0.07 | ✅ Balanced |
| Smaller (ml.m5.large) | 2 vCPU, 8GB | 25 min | $0.06 | Slower |
| Larger (ml.m5.2xlarge) | 8 vCPU, 32GB | 8 min | $0.07 | Faster, same cost |
| Spot instance | Same specs | 15 min | $0.02-0.05 | 60-70% savings |
💰 Cost Optimization Tips:
- Spot instances: 60-70% cheaper cho non-critical training
- Smaller instances: OK cho datasets < 1GB
- Studio auto-shutdown: Tự động tắt notebooks sau 1h idle
- Batch jobs: Thay vì real-time endpoints cho inference
📊 SageMaker Unified Studio Benefits:
- Integrated Workspace: Project-based collaboration với shared resources
- Managed Infrastructure: Auto-provisioned compute cho notebooks và training
- Cross-Region Support: Built-in handling của S3 cross-region access
- Asset Catalog: Automatic registration của models và datasets
- Team Collaboration: Shared notebooks, workflows, và approval processes
- Cost Optimization: Managed compute với automatic scaling
- Unified Interface: Single pane for data, ML, và generative AI workflows